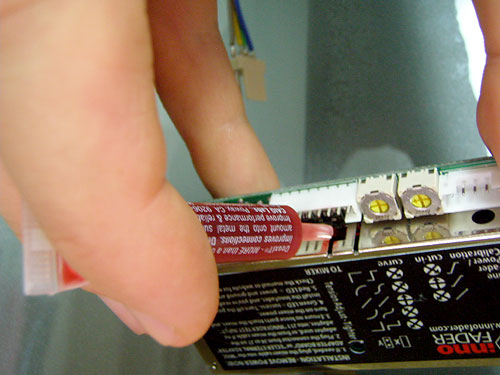
CURVE CONTROL
Does my mixer curve still work? Should I adjust the Innofader curve?
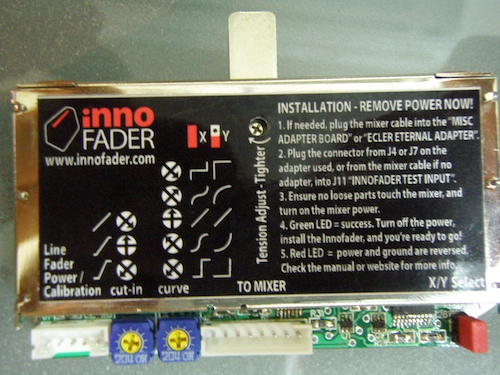
As a general rule, you should leave the curve setting on the Innofader at the factory default setting which is a linear curve. This will allow you to use the mixer curve control with the Innofader just like you did with your original fader. This is the factory default setting:

However, here are some cases where adjusting the Innofader curve makes sense:
1) If your mixer does not have enough curve control options, set the Innofader curve for the curve you want to use. The example below shows a good setting to use for scratching when your mixer is missing curve control. If you want to be able to change the curve on the fly, we recommend that you purchase an Innojuster.

2) Turn the dial clockwise until the cut is on-off if your mixer has multiple steps on the cut. Turning the dial further is not recommended because it will reduce your curve control range and possibly result in unwanted popping noises while cutting.

3) If there is a "dip in the middle" when the mixer is set to a mix curve, turn the dial clockwise until the dip disappears. *Note this only works in combination with the Y setting because the X setting fixes the signal at the center.
4) If the sound comes in too fast with your mixer set to a soft curve, turn the curve dial slightly counterclockwise for better mixing.
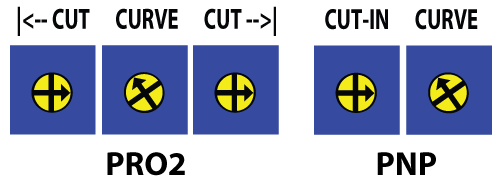
5) Using the X balanced curve, if you want the Innofader to do a quick left/right transform in the center of the fader, turn the curve dial counterclockwise as far as possible.
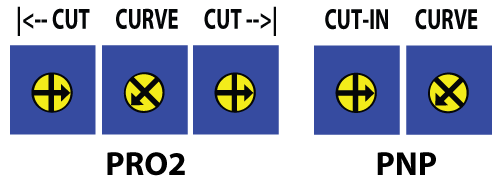
Note the mini Innofader PNP and mini Innofader Plus have 3 curve presets - A (slightly softer), B (linear), and C (slightly sharper). All other Innofader models have full curve control
What are X and Y?
"X" stands for balanced and "Y" stands for unbalanced. We chose these names based on the fact that balanced curves look similar to the letter X and unbalanced curves look similar to the letter Y when using test equipment to observe them. Our legacy products Innofader 909, Innofader Classic, and Innofader Pro all use a jumper to allow for customization. To reduce clutter on the user interface, the Innofader PNP does this automatically depending on the cable used and the Innofader Pro2 allows this customization via a preset. Innofader Pro and Pro2s also have special Y line fader presets designed for analog channel faders such as on classic Vestax PMC mixers. The mini Innofader only has balanced curves for simplicity.
As a general rule, you should use X curves for everything except for mixers with dual VCA controls. These mixers generally have 4 wires on the fader connector. The only 4 wire exception we know is on the Z2 faders - Z2 faders require X balanced curves. Since the Innofader PNP automatically selects Y curves for 4 pin connectors, please leave the curve dial in the middle on the Z2 or the left and right sides of the crossfader will behave differently!
HIGH PITCHED NOISE
When installing the Innofader Pro2 on a mixer which has a non-VCA crossfader, you may notice a slight high pitched noise on the output. The level of this noise is roughly the same as the white noise but may be slightly more noticeable because of the constant pitch.
We have done our best efforts to minimize this noise as far as possible on the Innofader Pro2. There is no way to eliminate this noise completely but there are a few things you can do to help:
1) Increase the EQ and channel gain and reduce the Master gain.
2) If the mixer has a curve control, the sharpest setting will minimize the noise
3) If you are also using an Innojuster, make sure you add the ground wire as indicated in the Innojuster instructions
4) You can have a technician add 10k resistors to ground on each crossfader input. This will reduce the noise by about -14dB
Note this issue only affects mixers which use non-VCA crossfaders. All digital mixers and controllers plus most good quality analog mixers use VCA crossfader circuits.
I SMELL SMOKE!
The best thing to do when this happens is immediately power down! This will minimize damage to both the Innofader and to the mixer. Then please contact us and we will do our best to get you up and running as quickly as possible. Most likely we will ask you to send the Innofader main piece plus any adapter boards you were using when this happened. We will then repair your Innofader free of charge and send it back to you in a timely manner.
LUBRICATION
As a general rule, we find that DJs tend to overlube the fader which makes it collect dust and get even more sticky. First check the fader tension because you can often fix the problem with the proper tension adjustment
NOTE: Only use the Caig Lube included with the kit or if you purchase the identical lubricant directly from Caig Lube. Using the wrong lube may either damage the fader or not allow you to achieve the optimal fader smoothness.
TIP: Add some tension to the fader during lubrication. This will help remove excess dirt and work the lube into the fader. Release the tension only once the fader starts to feel smooth.
- Cut off the protective plastic tip, and insert the mini tube included in the Innofader kit to allow 1 small drop of lube to be applied at a time.

- Move the fader stem all the way to the left or right so the top rail is visible hows through the center hole.
- Apply a drop of the Caig Lube included with the Innofader kit onto the top rail through the tension adjust hole. Move the fader back and forth a few times to work it in.
- Apply a drop of the Caig Lube onto the bottom rail. Move the fader back and forth a few times to work it in.
- Just in case you need to open up the fader and deep clean it - usually because it's been overlubed or got dipped in hot glue, etc - , here is a tutorial on how to do this.
We've included a variety of screws and knobs to make the fitting as smooth as possible for you.
VERY IMPORTANT for all full bodied Innofaders: Each box comes with 8mm screws. ONLY use these screws for the fader mounting plate if the extra length is needed. NEVER thread these directly to the Innofader itself!!! These will press against the rubber stoppers inside the Innofader and interfere with the cutting action!
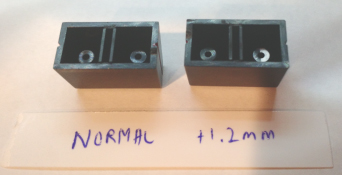
For full bodied Innofader models, each one comes with two types of knobs. You can tell them apart by looking at the underside. The one with the silver dot sits 1.2mm higher on the stem than the one without the dot. The extra 1.2mm height is helpful for Rane and Pioneer mixers which tend to have thick faceplates. This extra height means you won't need to stuff paper into the knob to keep it from scraping.
If you are using a mini Innofader Plus-S shipped after November 1, 2023, it will be easy to adjust the height simply by using the knobs with an indentation. These knobs sit 3.0mm lower on the stem so can easily get rid of any excessive gap between the knob and the faceplate.
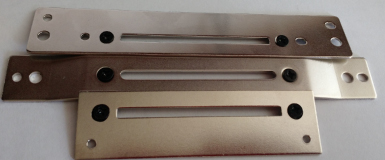
The standard short silver screws fit well with the Stanton / Allen and Heath plate. These are included with the Innofader Pro2.


For other faders try to use the original fader mounting screws. If these don't work or are missing, use the smaller Innofader screws with washers to hold them.
When using the Rane TTM or Pioneer fader mounting plates, please make sure to use the tiny black screws for mounting the Innofader. This will allow the plates to sit flat inside the mixer. Larger screws would cause the plates to bulge and the fit won't be as clean.
If the stem sticks out too far, use some washers between the mounting plate and the Innofader to lower the Innofader slightly. Generally you won't need to use more than about 2-3 washers per side. Each washer is 0.5mm thick and has adhesive on the back for easy mounting.
If the stem is too low and the fader still needs to be raised, use washers on the mixer mounting holes. If you are mounting your Innofader in a Numark DXM or X series mixers, use the longer silver screws with 5-6 washers on each side for mounting. Each washer is 0.5mm thick and has adhesive on the back for easy mounting.Never use the longer silver screws directly on the Innofader itself. These will press against and damage the rubber washers!
The mini Innofader PNP P and mini Innofader Plus both have super long stems. In some cases this length is needed but in other cases it will stick out way too far. If you need to lower the mini Innofader PNP P and mini Innofader Plus by 5mm or more, use the threaded spacers along with washers. Each washer is 0.5mm thick and has adhesive on the back for easy mounting. Start with 2 washers on each side to lower the mini by 5mm. Add more as needed up to 8 washers for an 8mm lower stem.
MIXER IS NOT LISTED
If you have an specific request to fit a particular mixer, please first:
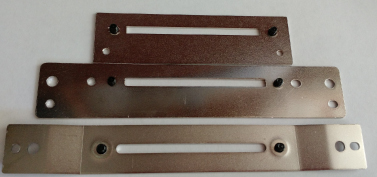
1) Make sure that the Innofader actually fits. There needs to be enough space to fit a 77mm long by 13mm wide by 45mm deep full bodied Innofader. The mini Innofader is 73mm long by 17mm wide by 11mm deep.
2) Make sure there is a way to either mount the Innofader directly on mounting holes spaced 65mm apart or if a plate adapter is needed.
3) Make sure that the Innofader can be mounted within 2.5mm of the faceplate so the stem sticks through the faceplate and the knob can be mounted.
4) See if your fader is on the list of compatible mixers. There's a good chance it's there already!
5) If the Innofader is not on this list, please write to us. If you can help test and take pictures this can help a lot!
NOISY CUT
On some mixers, there is a strong possibility that the Innofader will malfunction if you don’t take extra steps to insulate the Innofader body from the mixer case. After installation or extended use, the paint used on the fader mounting screws may chip off and the Innofader case may electrically connect to the mixer. When this happens on mixers with fader grounding issues, the Innofader has noise on the fader output during cutting.
We have found this cutting noise on several mixers: Ecler HAK 360, Korg Zero 4, the Urei 1603, and even older Vestax PMC mixers. Whenever in doubt, it won't hurt to add the following steps to prevent the Innofader from touching the mixer case. The following procedure is extremely effective in eliminating automatic on/off cutting noises from the fader:
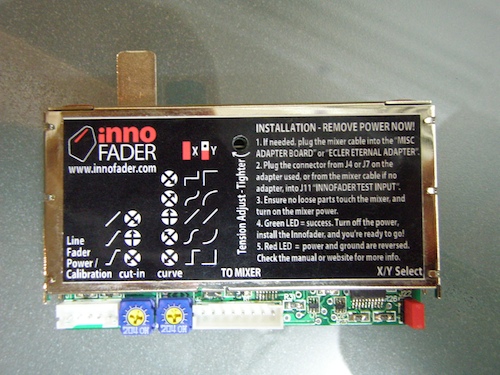
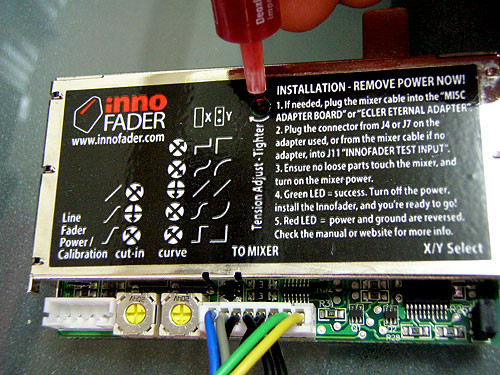
*On the Innofader Pro2, you can also fix this issue by doing the "Signal Overlap" preset as shown here and here. This allows you to adjust the on/off overlap to get rid of noise.
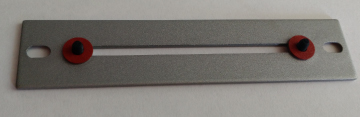
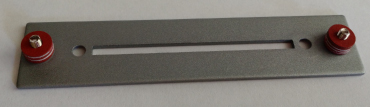
Prior to installing the Innofader, place two self-adhesive washers, one on each of the 2 crossfader mounting holes.
While installing the Innofader, please use the two M3 6mm insulating screws included with the Innofader to install the Innofader. These screws are the shorter screws with the slotted flat head included in the Innofader kit.
OPENING THE FADER
Please see our forum post for detailed instructions.
NON WORKING FADER / OUTPUT BLEEDS
You got everything plugged and put back together, power on the mixer, and dang...the Innofader doesn’t work or bleeds. No need to panic - we have you covered - but before you call us, there are a few things you can check first:
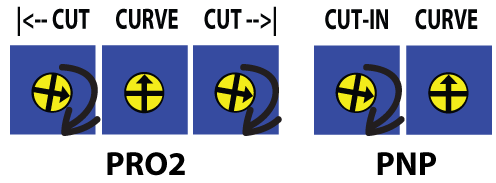
1) Start by setting the curve dial in the middle and the cut-in dials pointing to the right.
Then set the mixer for a mix curve. If the Innofader can fade the audio, chances are just a little tweaking is needed to make it work.
2) For the mini Innofader, please try recalibrating. For other mini Innofader models, increase the lag on the side that is bleeding:
mini Innofader PNP P increase lag
mini Innofader Plus increase lag
3) For the Innofader PNP, please see if the following mods are needed:
For Old Vestax PMC mixers and For Vestax PMC-08, Rane Empath, Denon DN-X1500, and Ecler EVO4
4) Please double check product instructions as well as mixer specific instructions to make sure you did the installation correctly.
5) If you have an Innofader PNP and only one side seems to work correctly, please follow the instructions TO RECALIBRATE on the label.
Still no joy? Please contact us.
REPLACING THE STEM
Please see our forum post for detailed instructions.
TENSION ADJUST
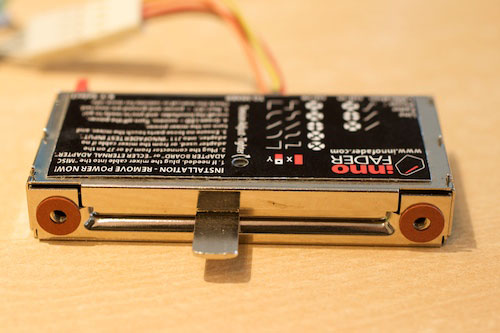
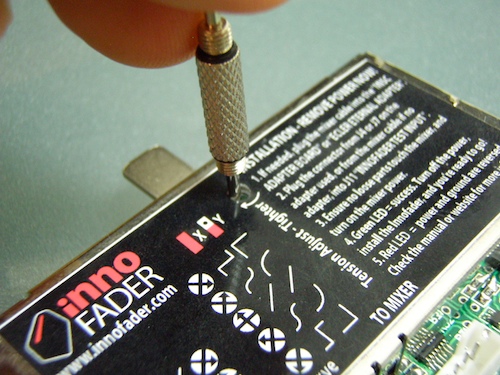
Move the fader to the center so that the tension adjust screw shows through the center hole.
Turn the screw clockwise to increase the tension or counterclockwise to decrease the tension.
TIP 1: If the Innofader "drags" chances are you loosened the screw too far. Tighten it back down to fix this.
TIP 2: Turn the screw clockwise until the fader becomes stiff, then loosen it just to the point where you want it. This will optimize the electronic operation of the Innofader and keep the screw from loosening on its own.
TOO MUCH LAG
1) For the mini Innofader, please try recalibrating. For other mini Innofader models, decrease the lag on the side that is bleeding:
mini Innofader PNP P decrease lag
mini Innofader Plus decrease lag
2) For the Innofader PNP and Pro2, simply turn the cut-in dials clockwise to reduce the lag.
3) For the Innofader Pro2, you can also fine tune the cut point by following the instructions here and here.
Still no joy? Please contact us.