Replacing the Stem on a Full Bodied Innofader
Hello All,
We've received several requests on how to swap out the fader stem on our full bodied Innofaders. Especially many of our customers find it difficult to open the fader and deal with all of those little parts. The below procedure shows the proper way to do this while causing minimal wear on the tabs.
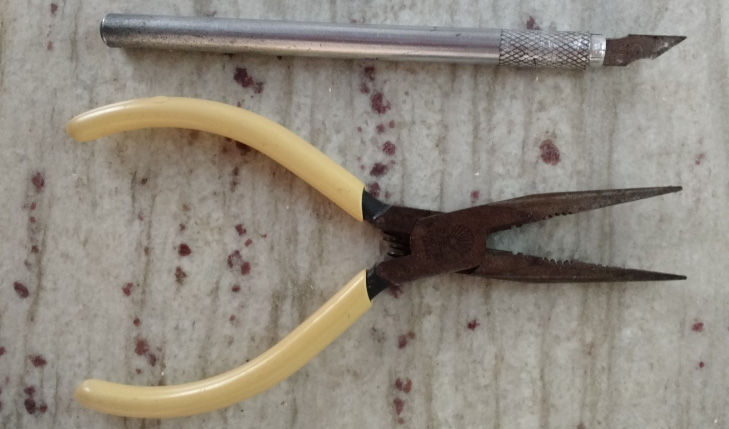
The tools you need are actually fairly basic - just locate an exacto knife and a needle nose pliers like the ones in the following picture:
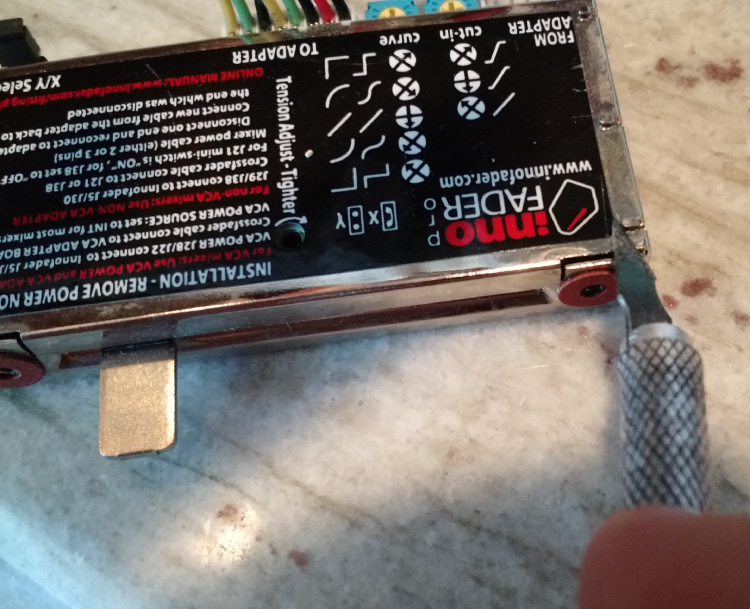
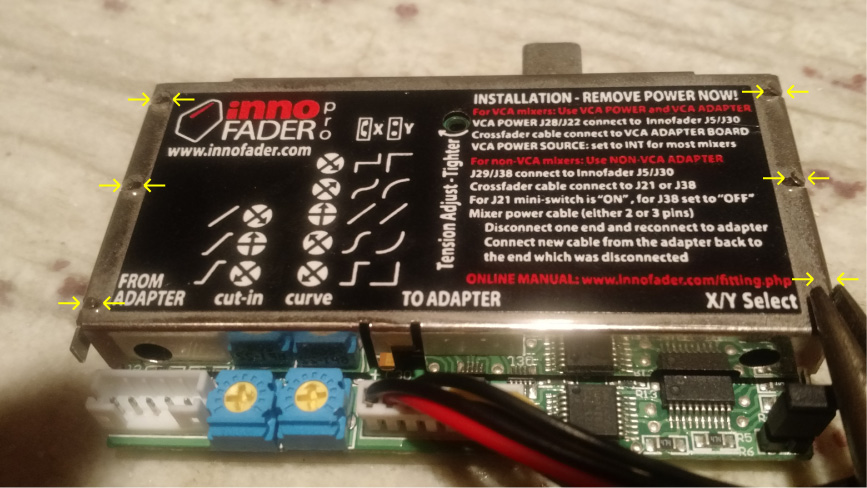
Now use the exacto knife to bend each of the tabs up as shown here:
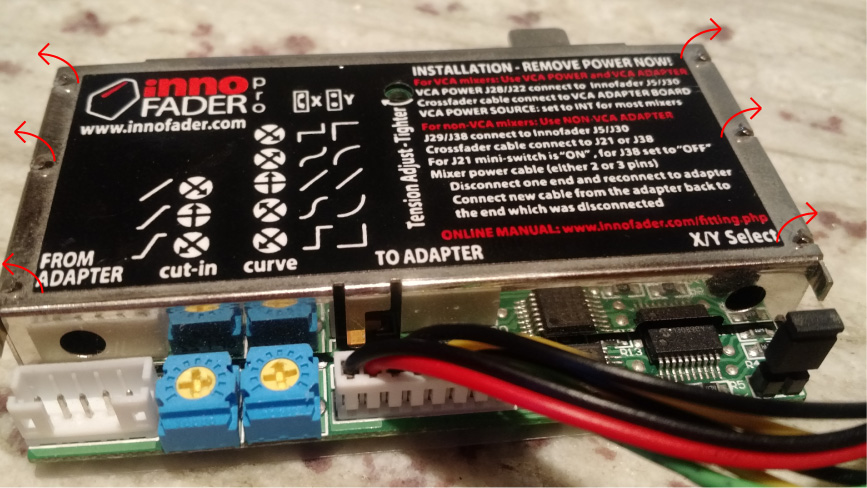
When you are done, the tabs should all be bent at about a 45 degree angle like this:
The next step is to fully straighten the tabs using a needle nose pliers by squeezing the pliers together. ***If you have difficulty straightening the tabs, it may help to try to bend them more with the exacto knife first. Remember to squeeze the pliers together because if you forcefully try to pull the tabs back, they will break!
When you are done straightening the tabs, the Innofader should look like this:
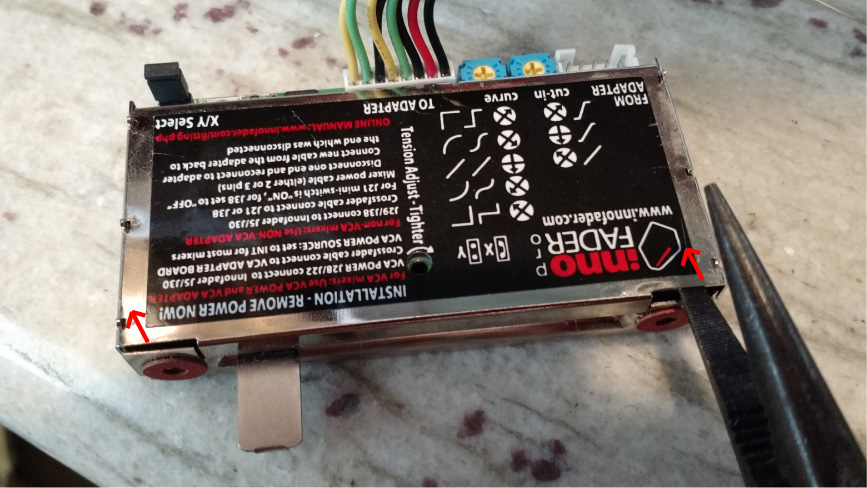
Then remove the case by lifting it off with the needle nose pliers. Lift on both sides until the case pops off
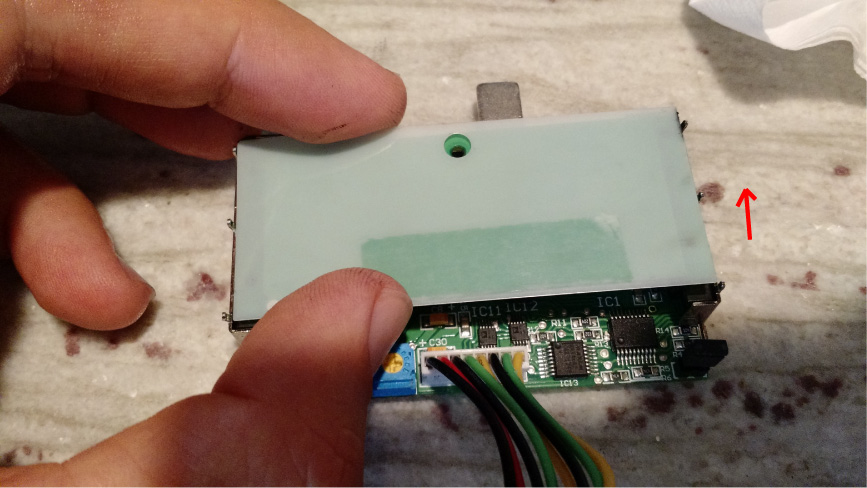
Once you pop off the case you should see the sensor board. Simply lift this off:
At this point you should be able to lift the whole rail assembly out. ***Be extremely careful not to lose the small rubber piece circled below. It is actually a special conductive part that grounds out the stem and prevents interference with the sensor.
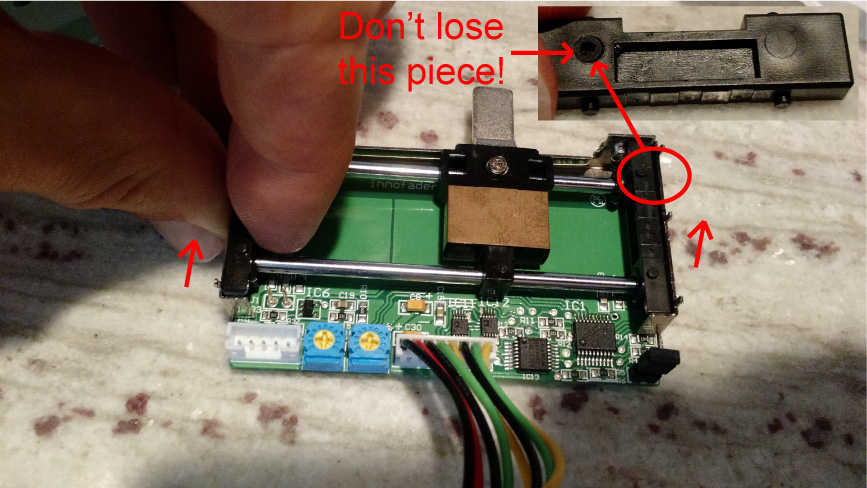
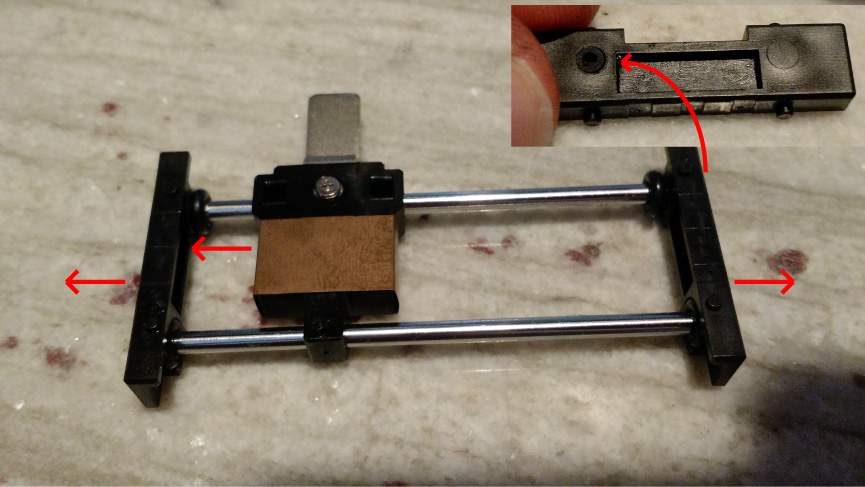
Once you've lifted the stem assembly out, pull the 2 brackets to each side so that you can slide the stem off. Continue to be mindful of the small rubber piece at the end because this piece is important for the proper operation of the Innofader.
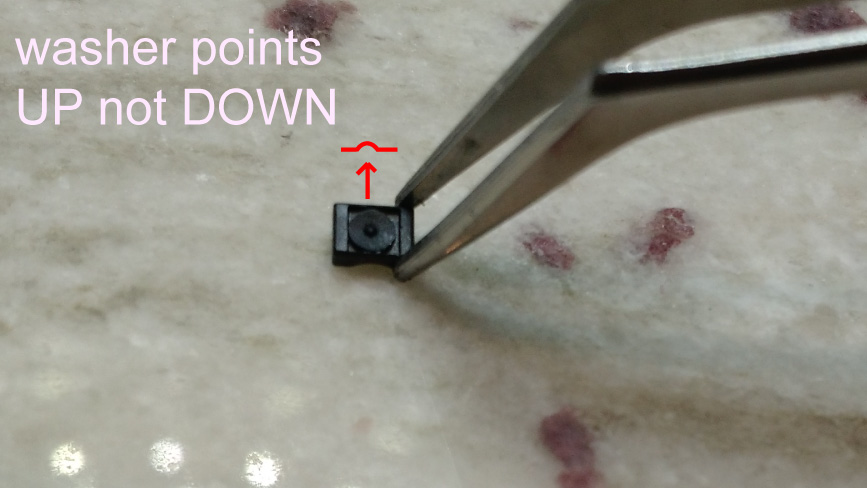
Before placing the new bobbin on the rails, make sure to properly assemble the washer pieces that go inside. One of them is hard and U shaped. The U shape coats the rail. The other side is a small black rubber washer. Make sure the pointed end is sticking up...this is critical for making the tension adjustment feel and work properly.
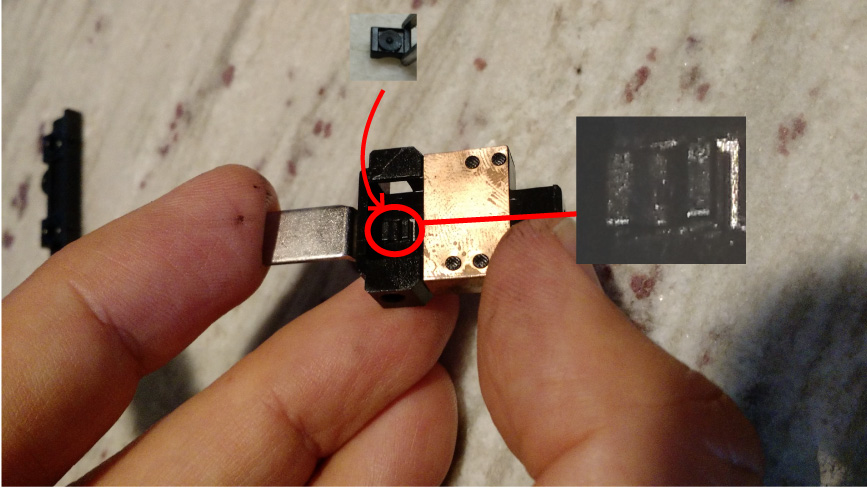
Now place the washer on the bobbin assembly as shown here below. Carefully flip over the washer so that the small rubber piece doesn't fall out, and make sure the pointed part of the rubber washer is facing the tension adjust screw.
Now reassemble the bobbin. You want to place the bobbin on its side and make sure that the end cap with the loose rubber end piece is on the bottom. This makes it easy enough to assemble without worrying about losing this part
Now place the rail assembly back into place. Be mindful of the small rubber piece at the end of the rail. You should notice it rubbing against the case as you press down on the assembly ***Make sure that the rail assembly "clicks" into place.

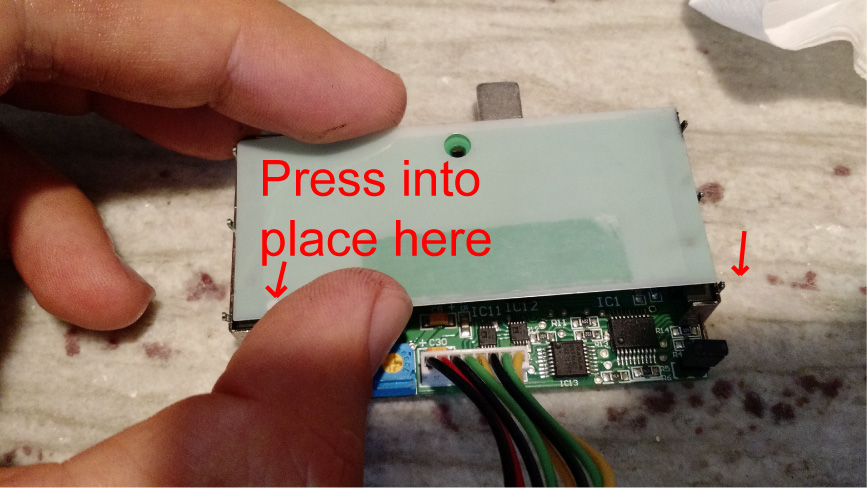
Now place the sensor board back into place. Align the connector with the pins as shown, and press into fit. Also for this part, you want to feel a distinct "click" once the sensor board is pushed all the way down.
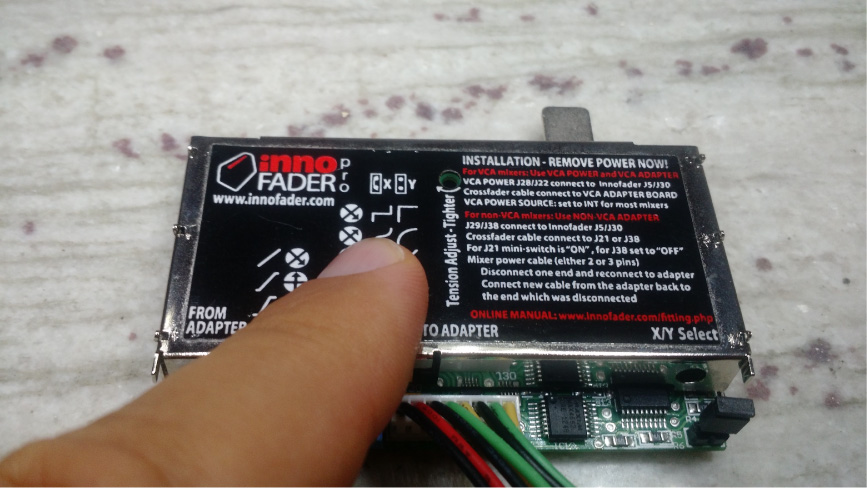
Press the case back on. The tabs should pop all the way through. If for some reason they don't, this means that either the sensor board or rail assembly wasn't snapped properly into place. In this case, please remove the case and recheck these parts first, then press the case on again
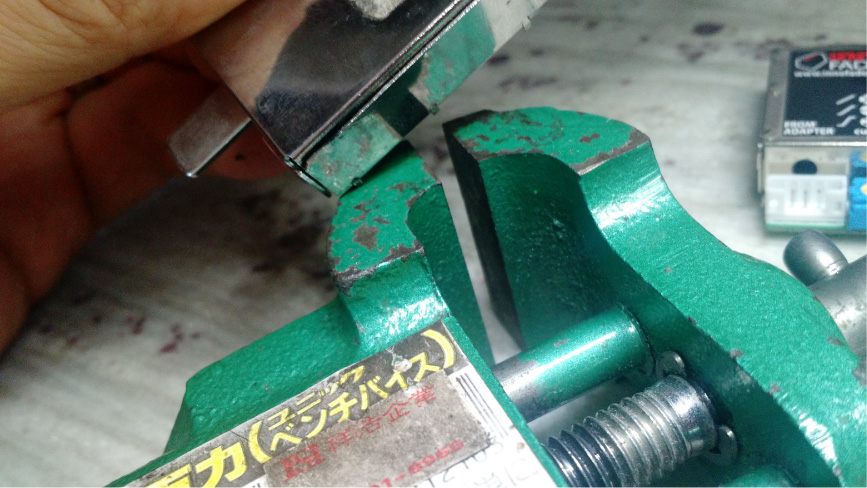
The final step is to bend the 6 tabs back into place. You do this by pressing the tabs at an angle against a really hard surface. I used a vice grip here, but also a hard stone or the edge of a good tool will also work.
Once you have bent all of the tabs back into place, the Innofader main piece should then look like this: