
Forum archive
Threads from the old Audio Innovate forum.
Mackie d.2 with the Innobender or mini Innofader Plus
This shows the installation of the Innobender or mini Innofader Plus for the Mackie d.2. Start by removing the plate which covers the crossfader and channel fader section, removing the original crossfader, and disconnecting the crossfader.
PLEASE SKIP TO "CABLE REWIRING" FOR THE MINI INNOFADER PLUS.
INNOBENDER STEM MOUNTING:
Prepare the Innofader body itself with mounting hardware.
On the two Innofader mounting holes, first place 2 round washers on each hole, then screw in the 14mm long threaded hex spacers. NOTE: on this picture two spacers are used together to achieve 14mm length, but on the actual Innobender Kit the single spacers will be 14mm long.
On the Innofader stem itself, mount the stem with a 20 degree angle using a hex screw and lock washer on each side. Note the Innobender kit includes a shorter and longer stem; in this case use a longer stem.
The result is shown here:
Mount the Innofader to the Mackie crossfader plate using the two slotted insulated screws included with the Innofader. Between the Innofader body and threaded spacer, use a white angled washer on each side of the Innofader.
CABLE REWIRING
Now let's do the wiring. The d.2 is a special proprietary connector that needs to be rewired to connect to the Innofader.
Remove wires connected to pins 1, 3, 4, and 8 of the original Mackie crossfader connector.
Reconnect wires as such; 9p is the Mackie connector and 4p is the spare connector included with the kit.
9p 4p
1 2
3 3
4 1
8 4
See the second below image for a picture showing how to remove pins from the connector using the mini-screwdriver included in the Innofader kit
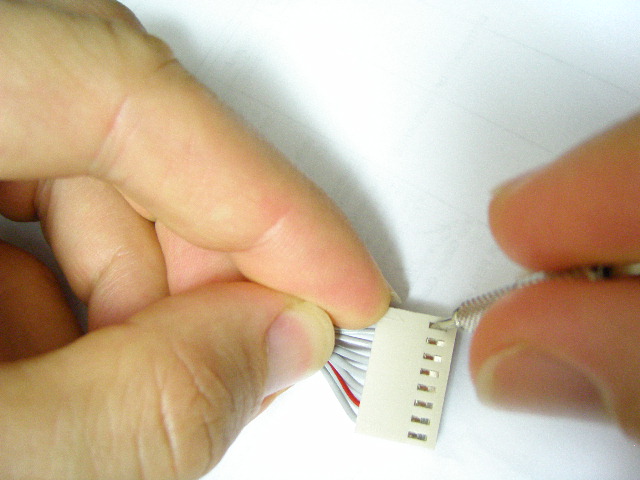
Now instead of using the Innofader adapter board, it's probably easier just to hook up the connector directly to the Innofader as shown here:
Wrap some electrical tape around the exposed connectors:
Install the Innofader:
Place the cover back on and you're done!