Technics SH-DJ1200 Innofader Pro Install
3/18/2016 edit: Now includes both Innofader Pro2 and Innofader Pro instructions:
INNOFADER PRO2 INSTRUCTIONS:
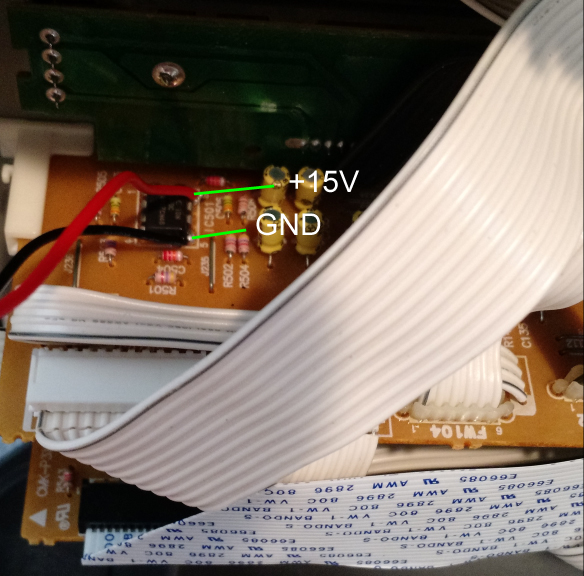
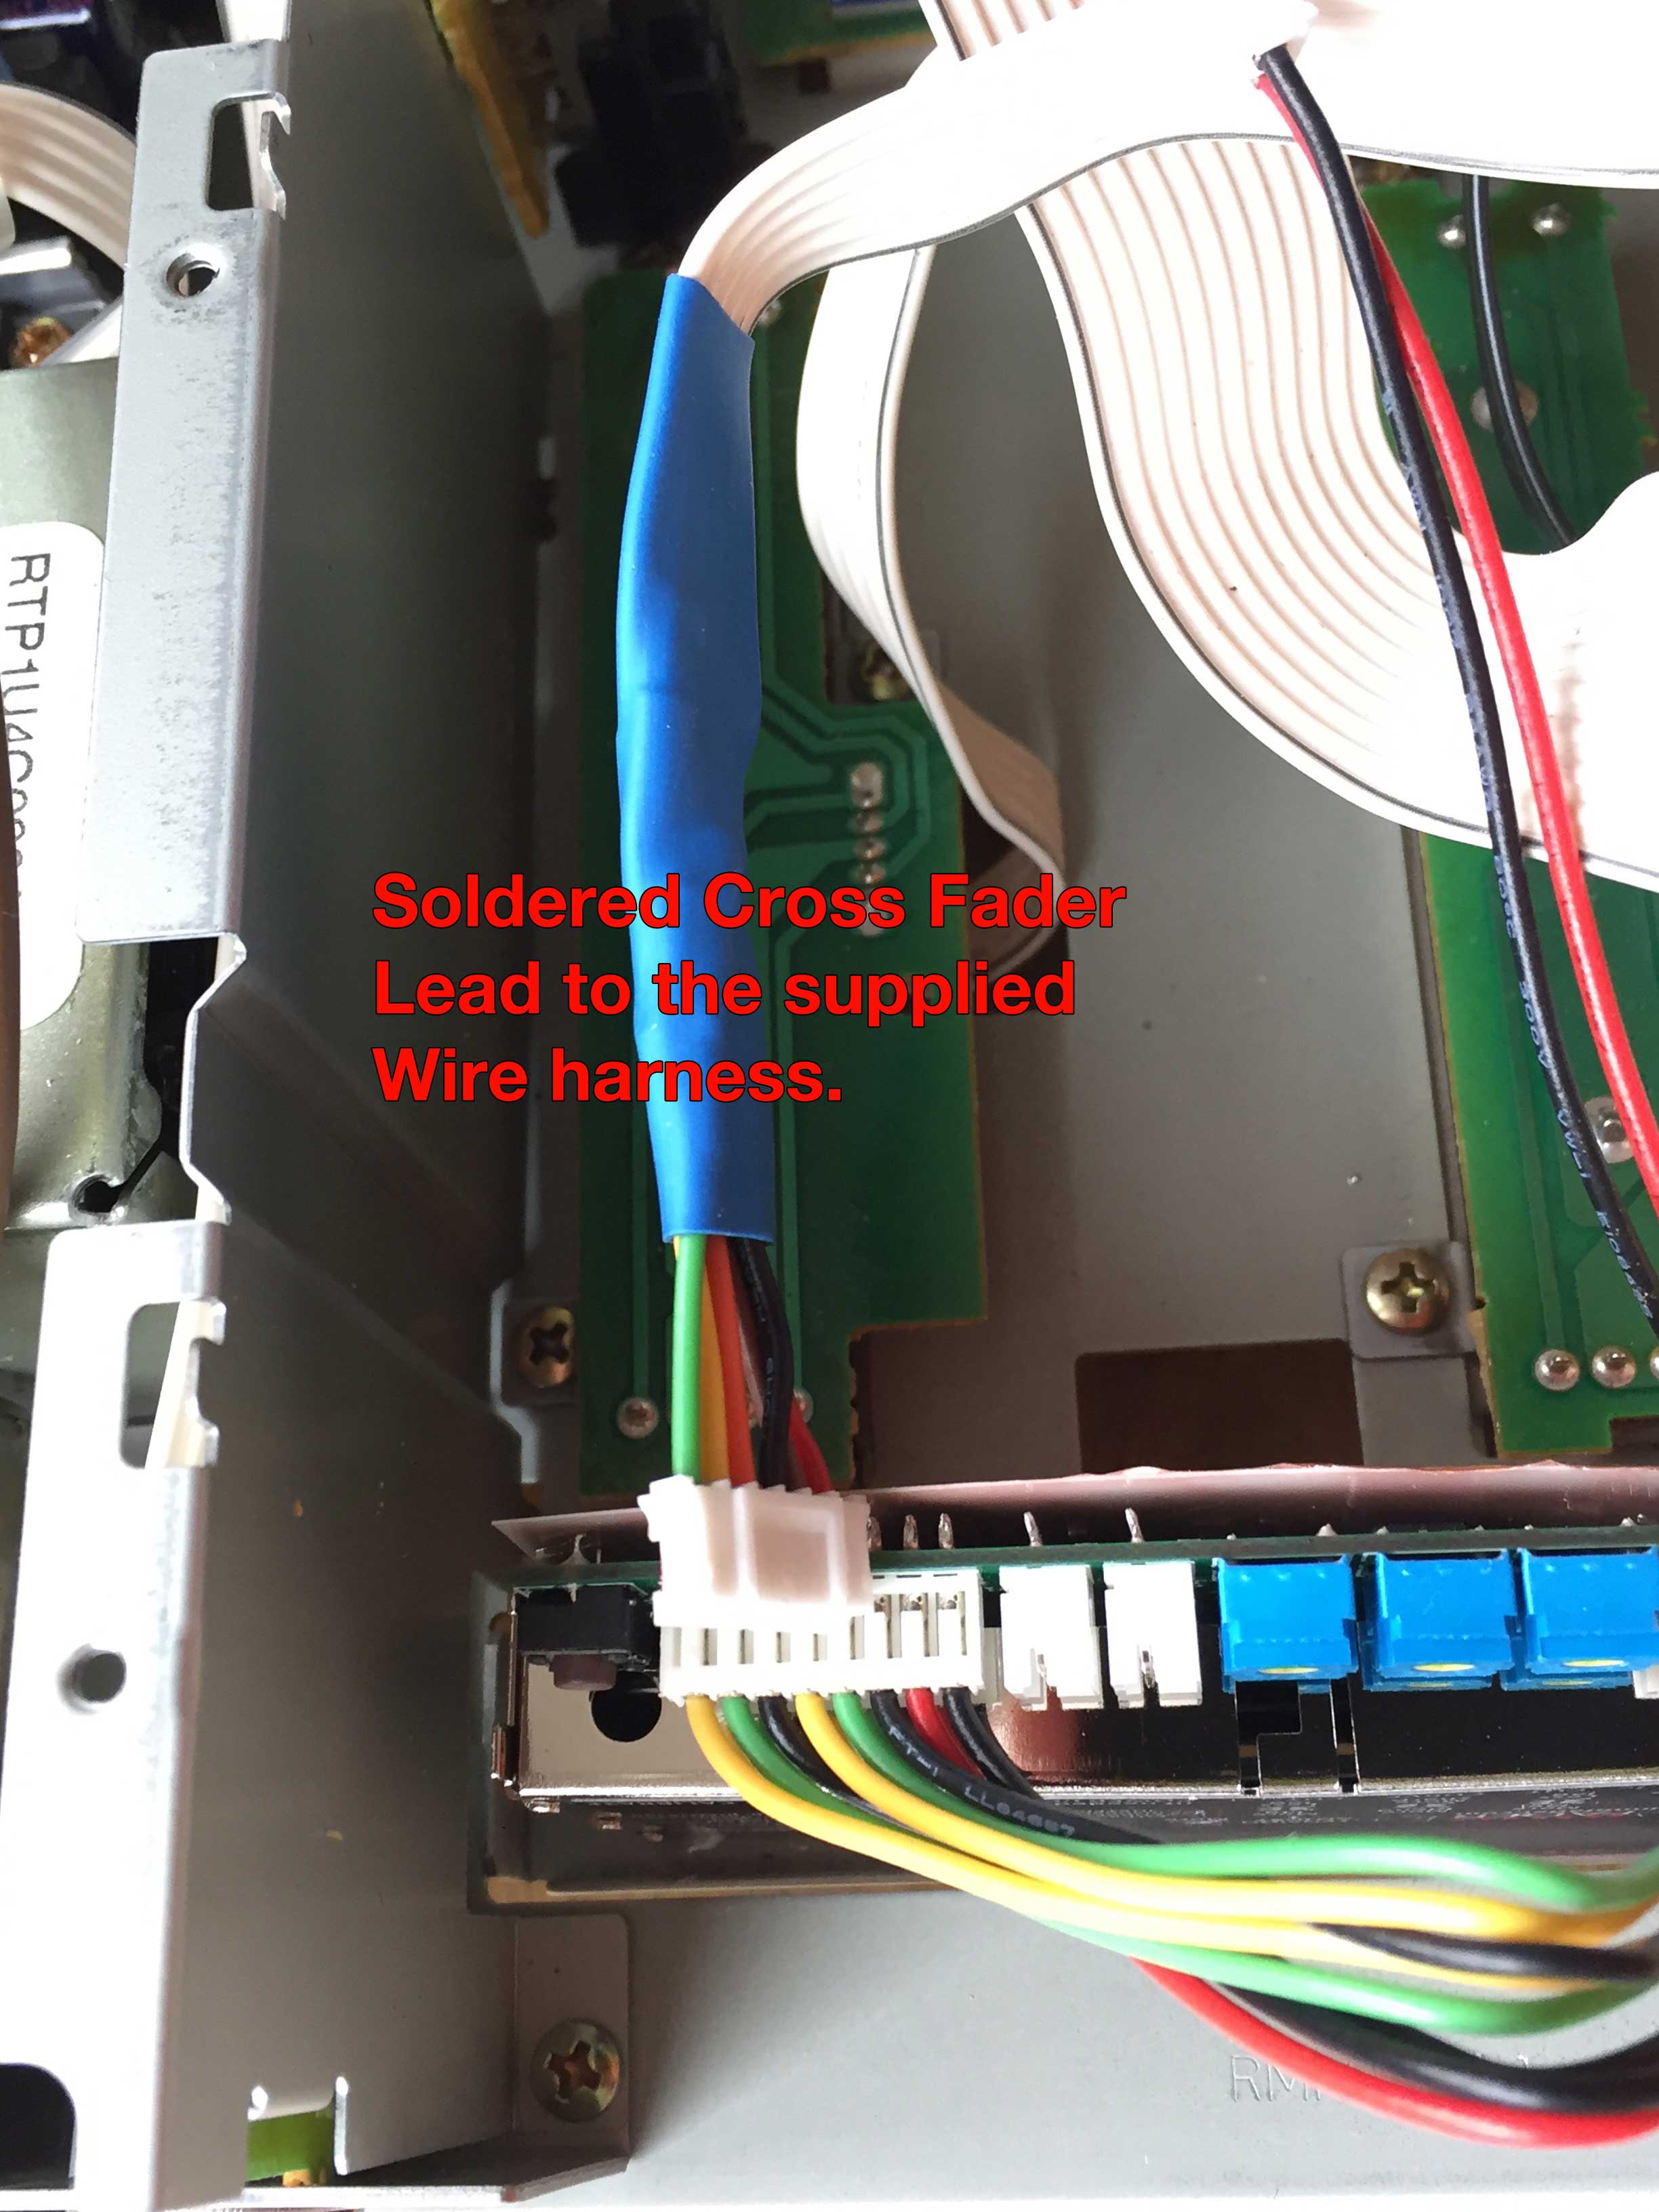
First locate the 2 wire cable in the Innofader Pro2 box. One wire is red and the other is black. Take one end of the cable, clip off the 2 pin connector, and strip the wire about 1/16", just enough so you can solder it. Solder the red wire to pin 8 of IC501...this is the +15V DC supply for the fader. Solder the black wire to pin 5 of IC501...this is the GND or ground reference for the DC supply.
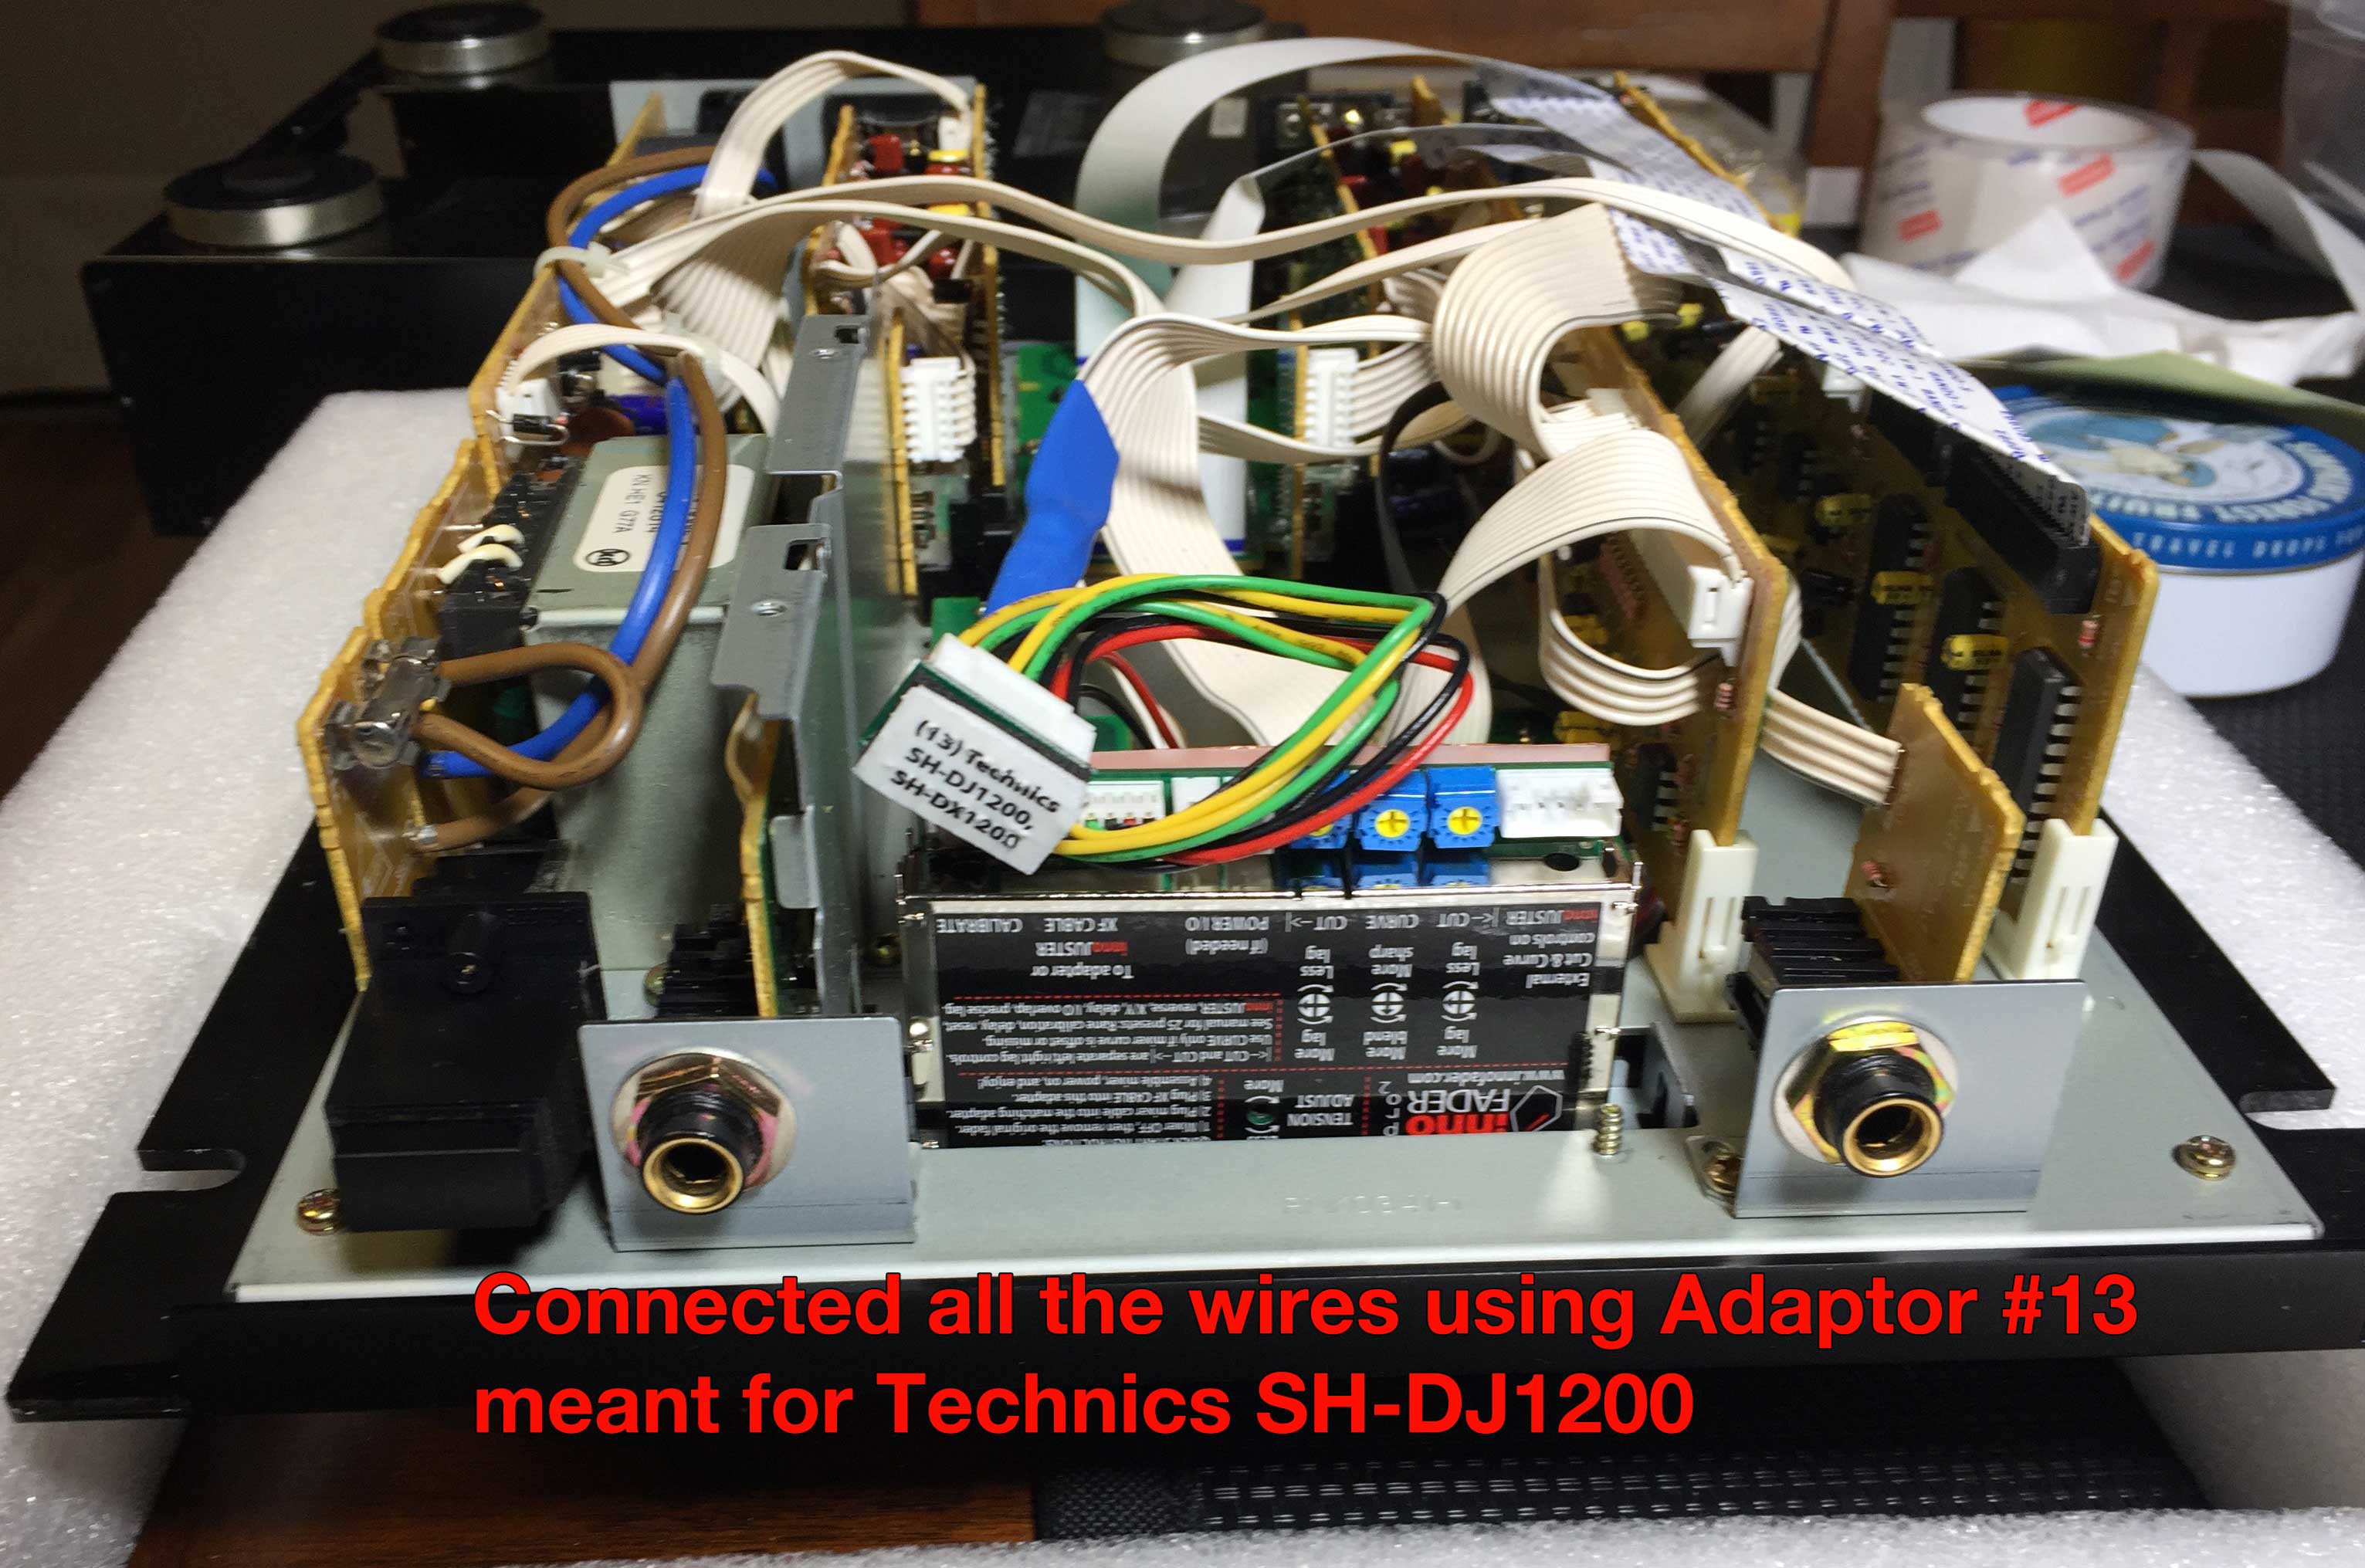
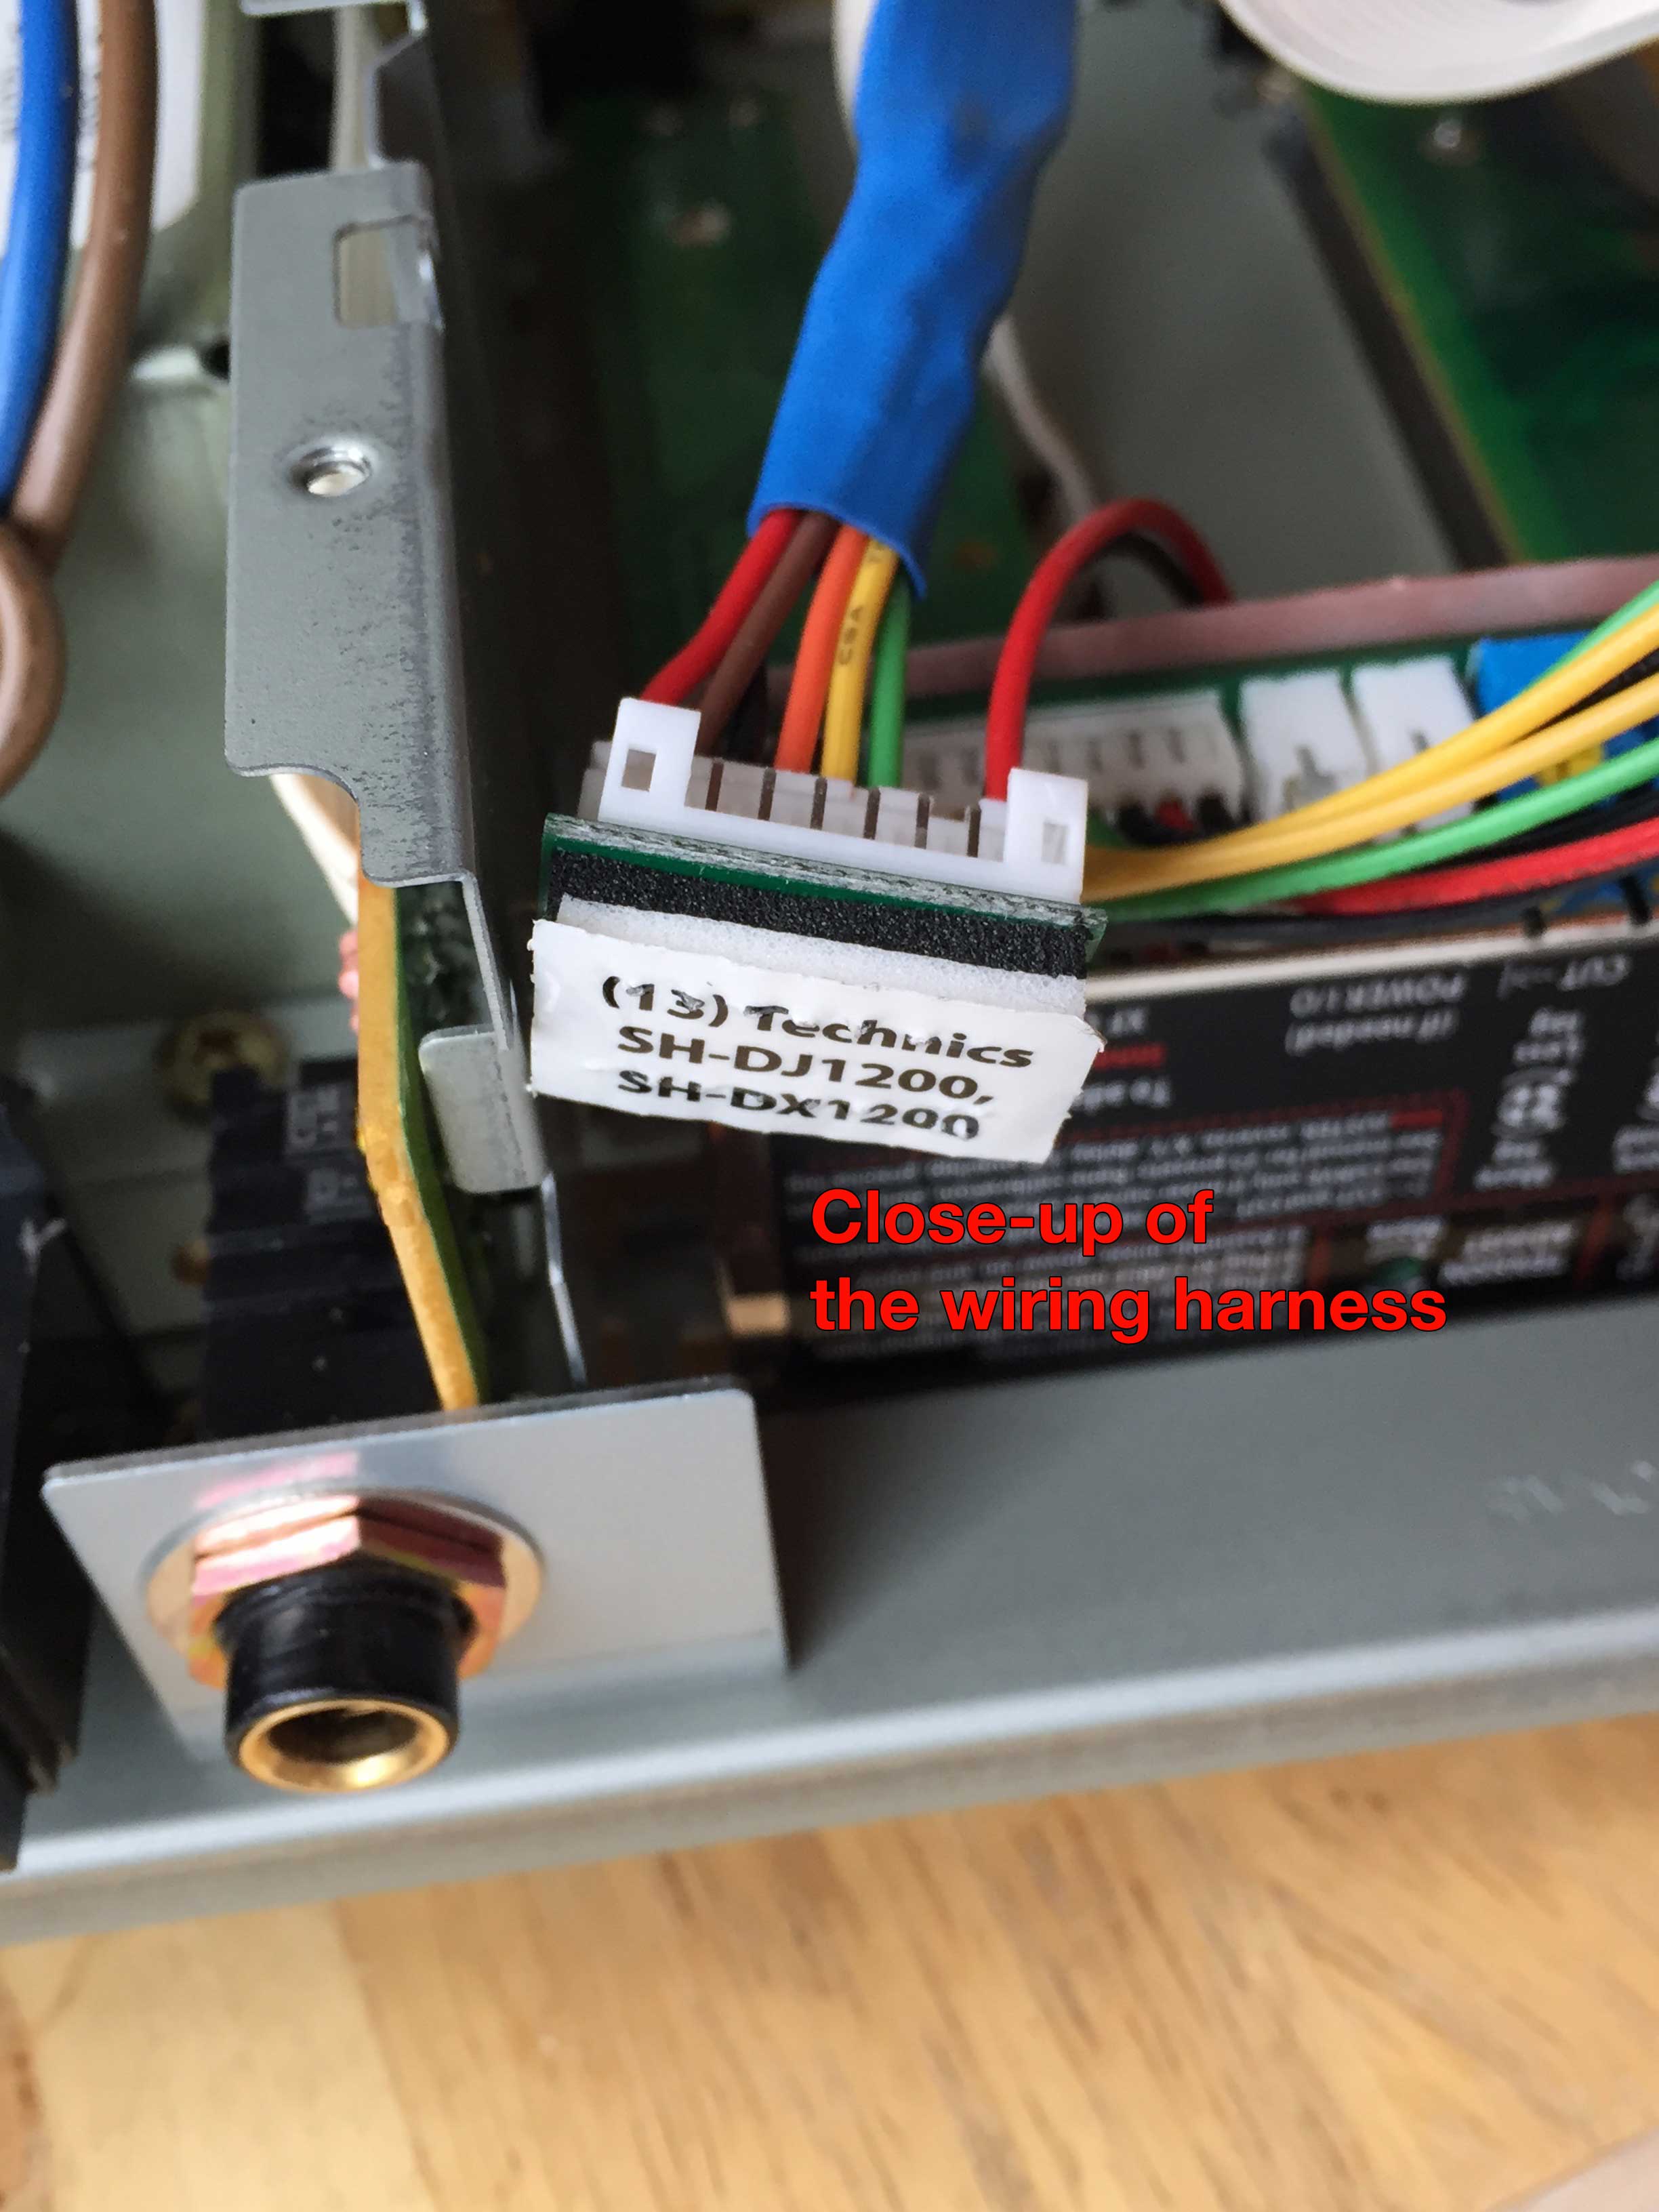
Now locate adapter (13) which works for the SH-DJ1200. You will need to peel off the back so you can solder wires to the adapter. Please reorder the crossfader wires and solder to the connector as indicated in the below picture. Make sure pins 4 and 5 are shorted together, and don't forget to put the label back on when you are done!

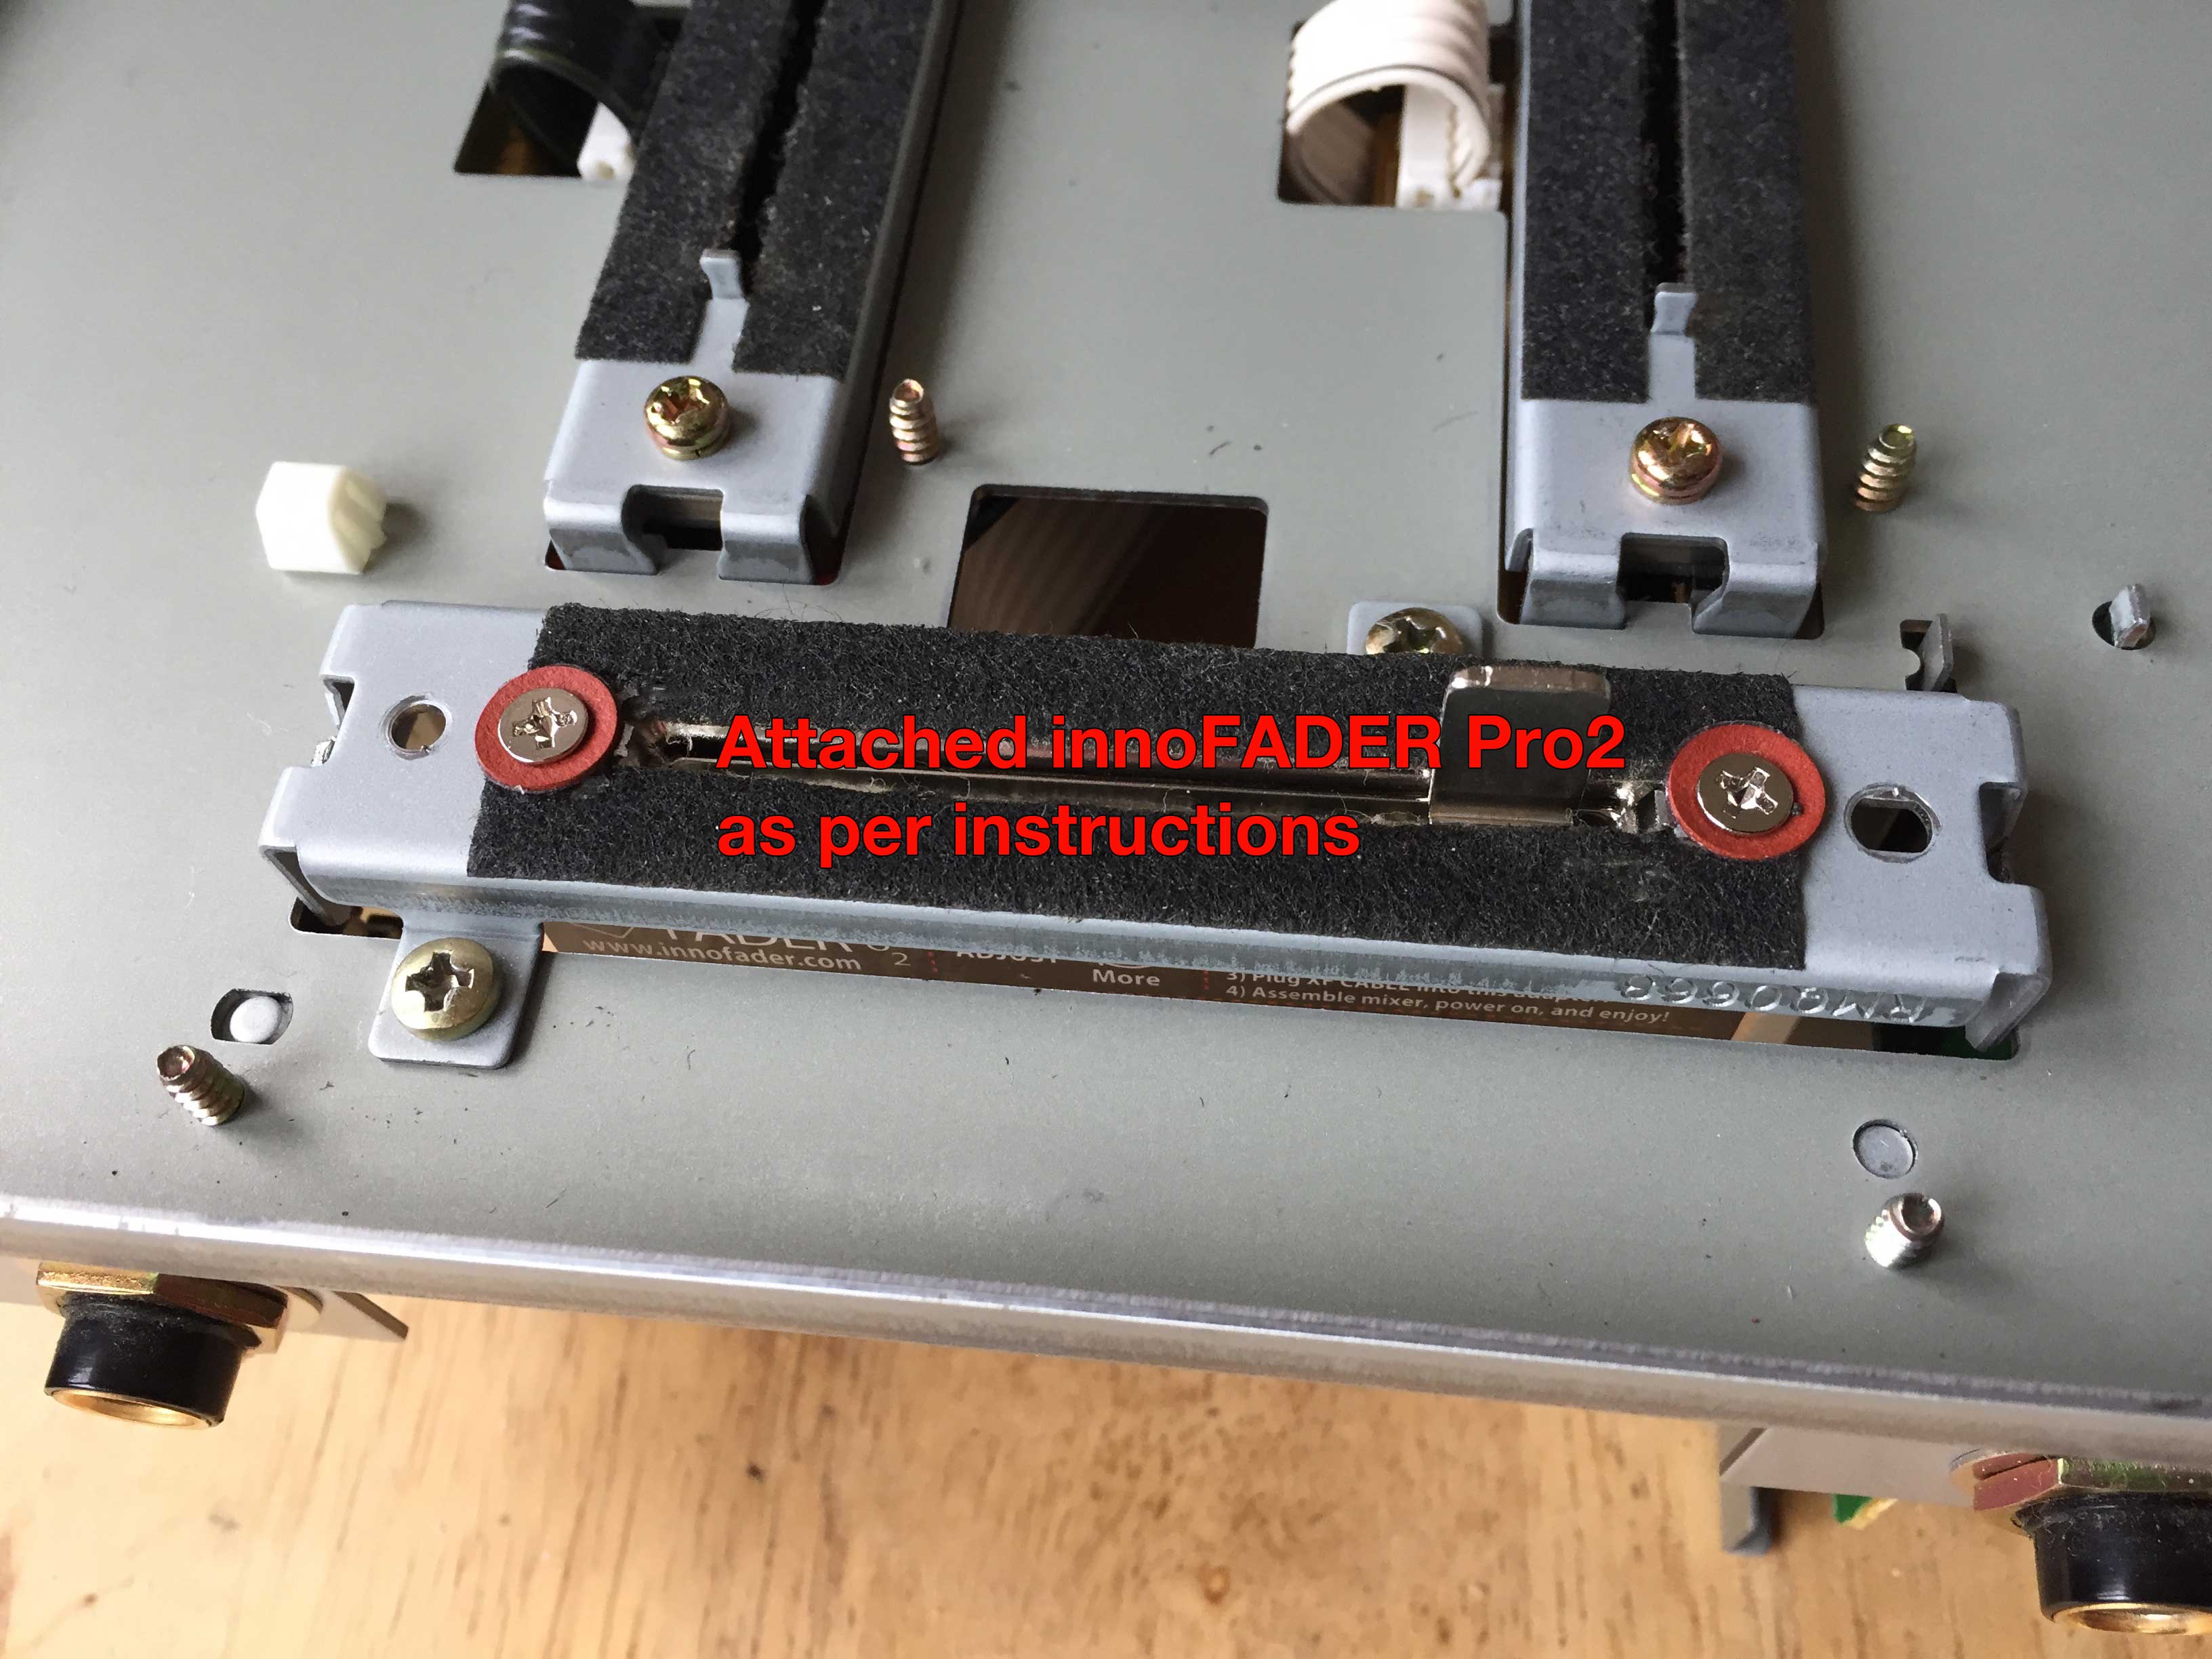
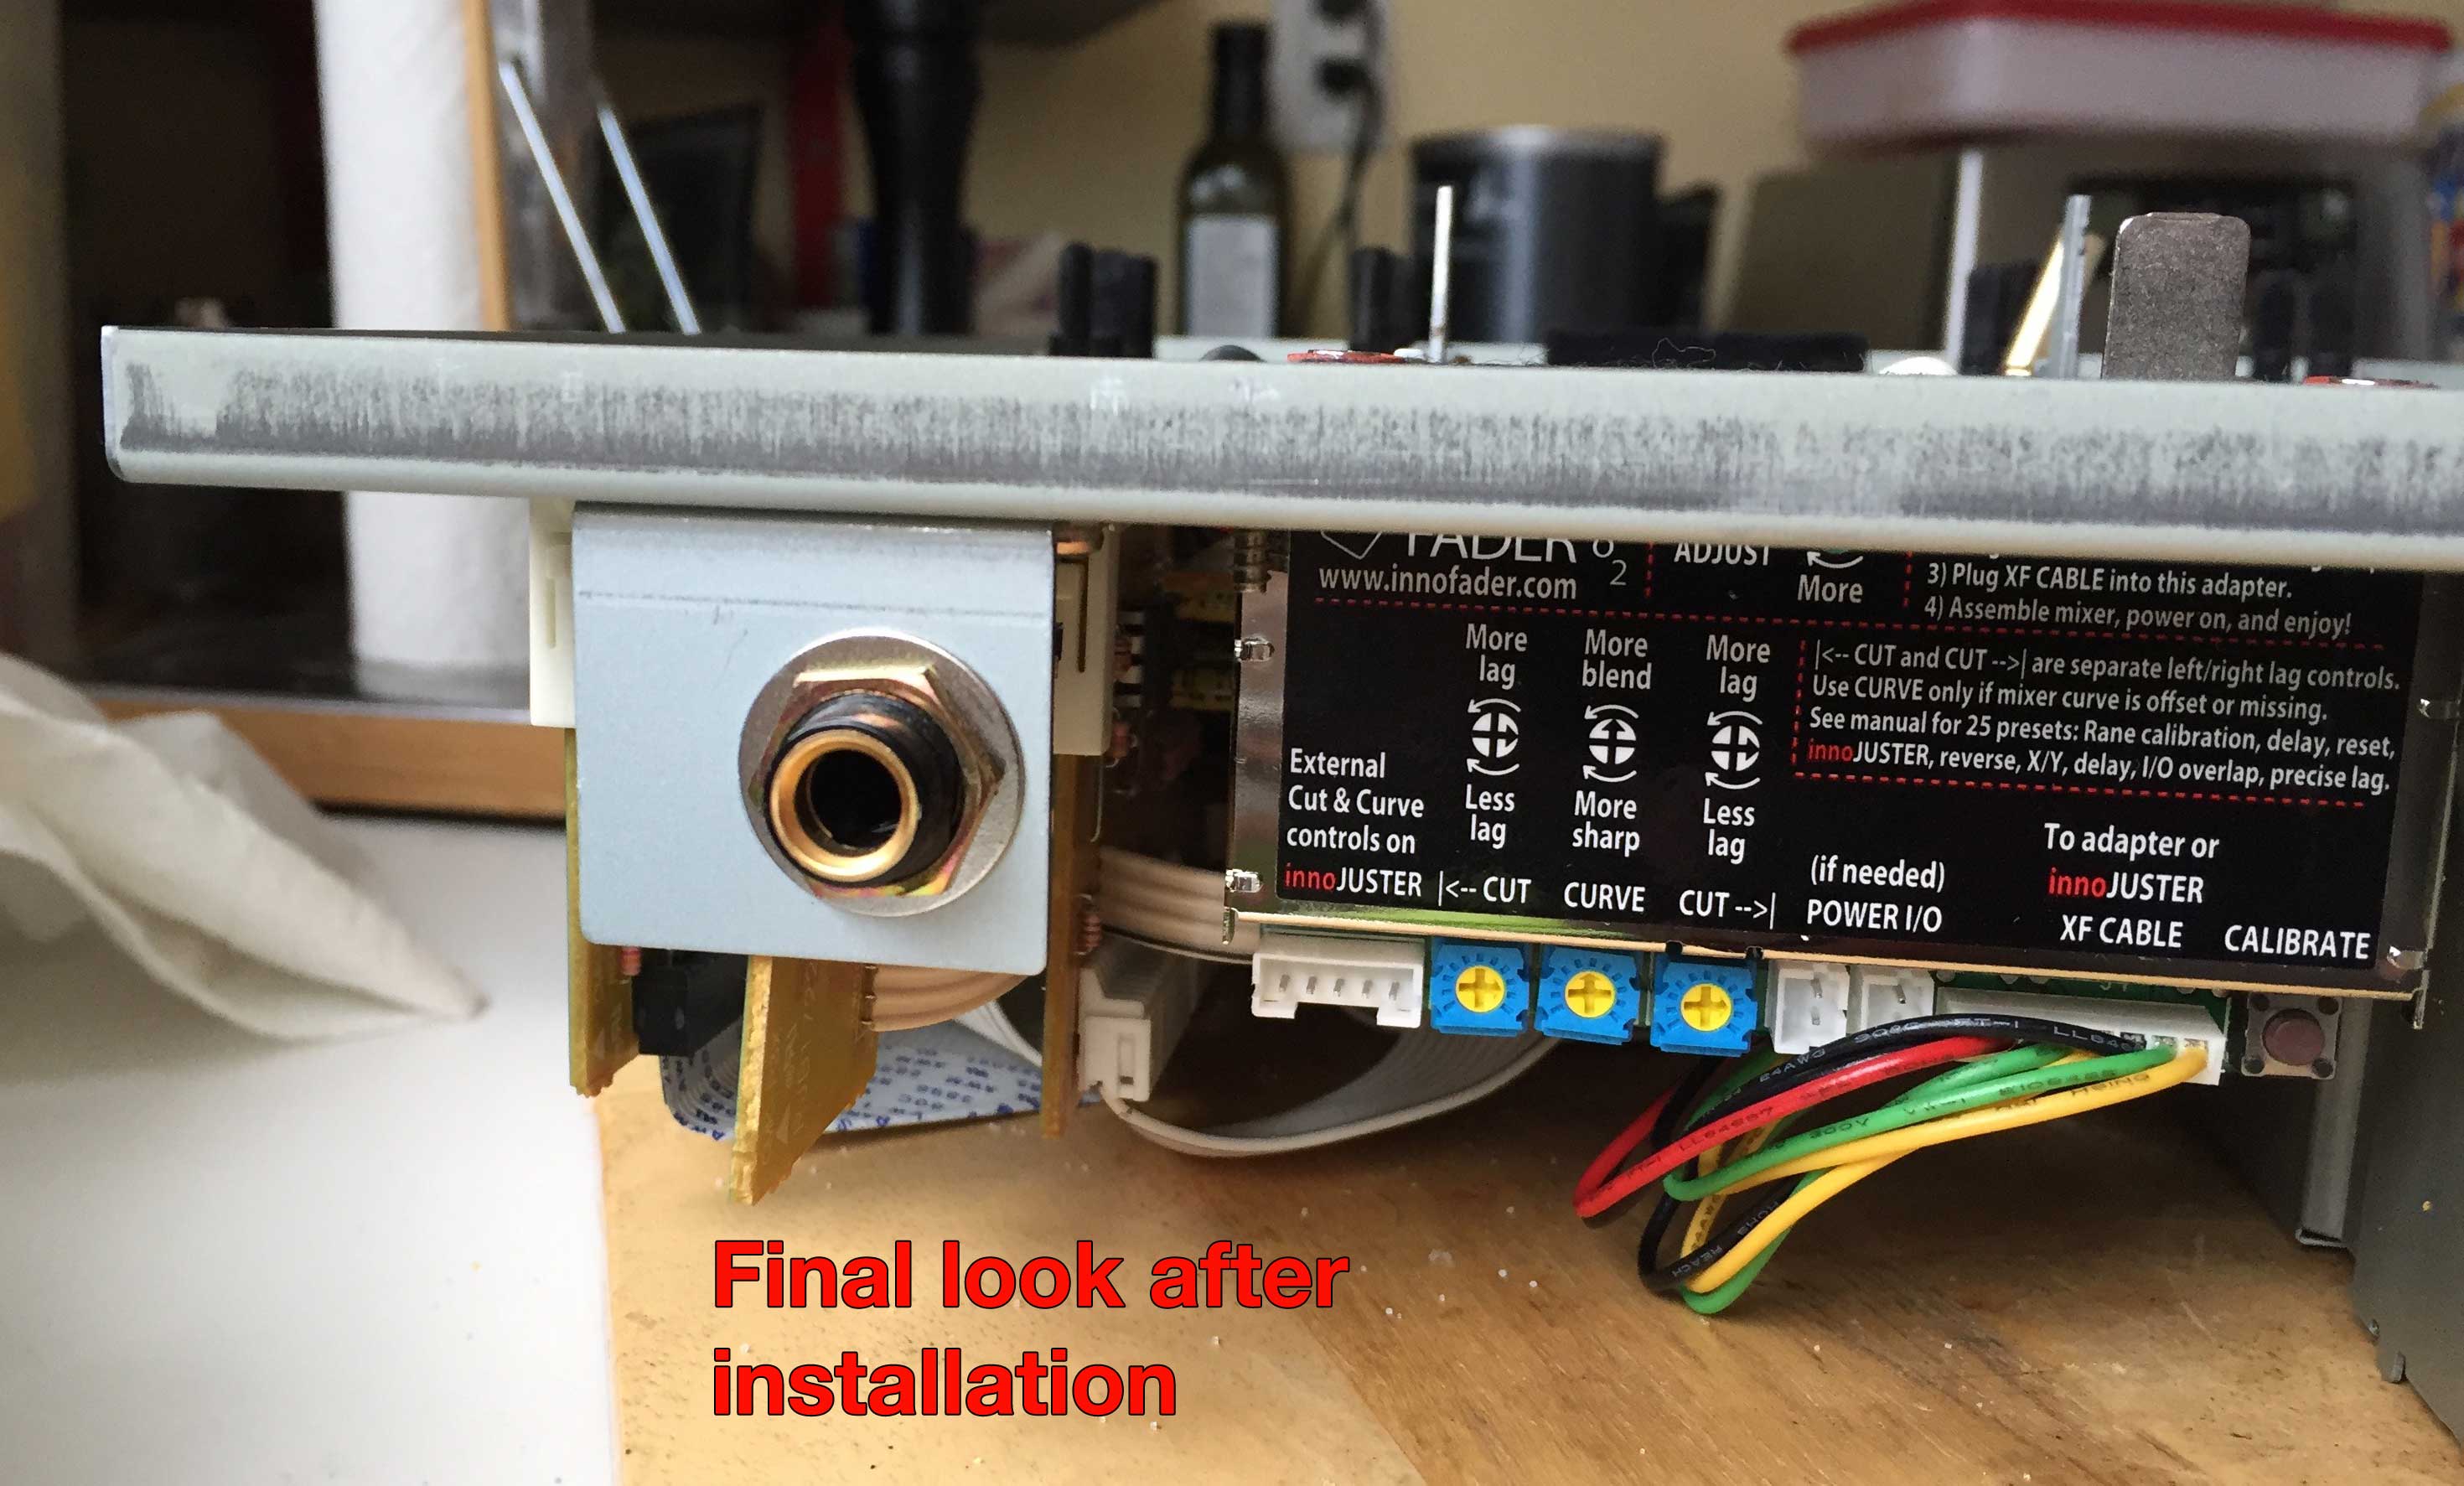
Once you have completed the installation, it should look like this:
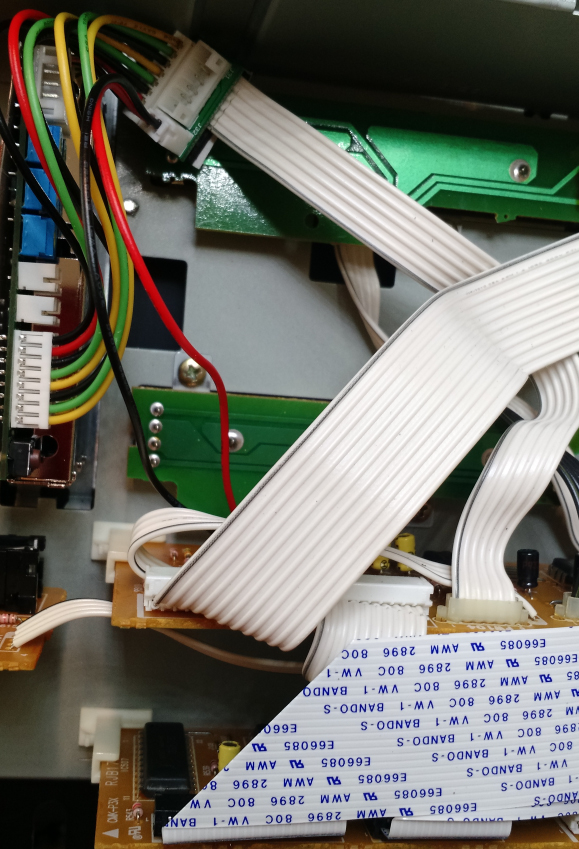
Special thanks to Ash Mukerjea for providing the following pictures:


INNOFADER PRO INSTRUCTIONS:
Special thanks to Audey Bautista for contributing the images!
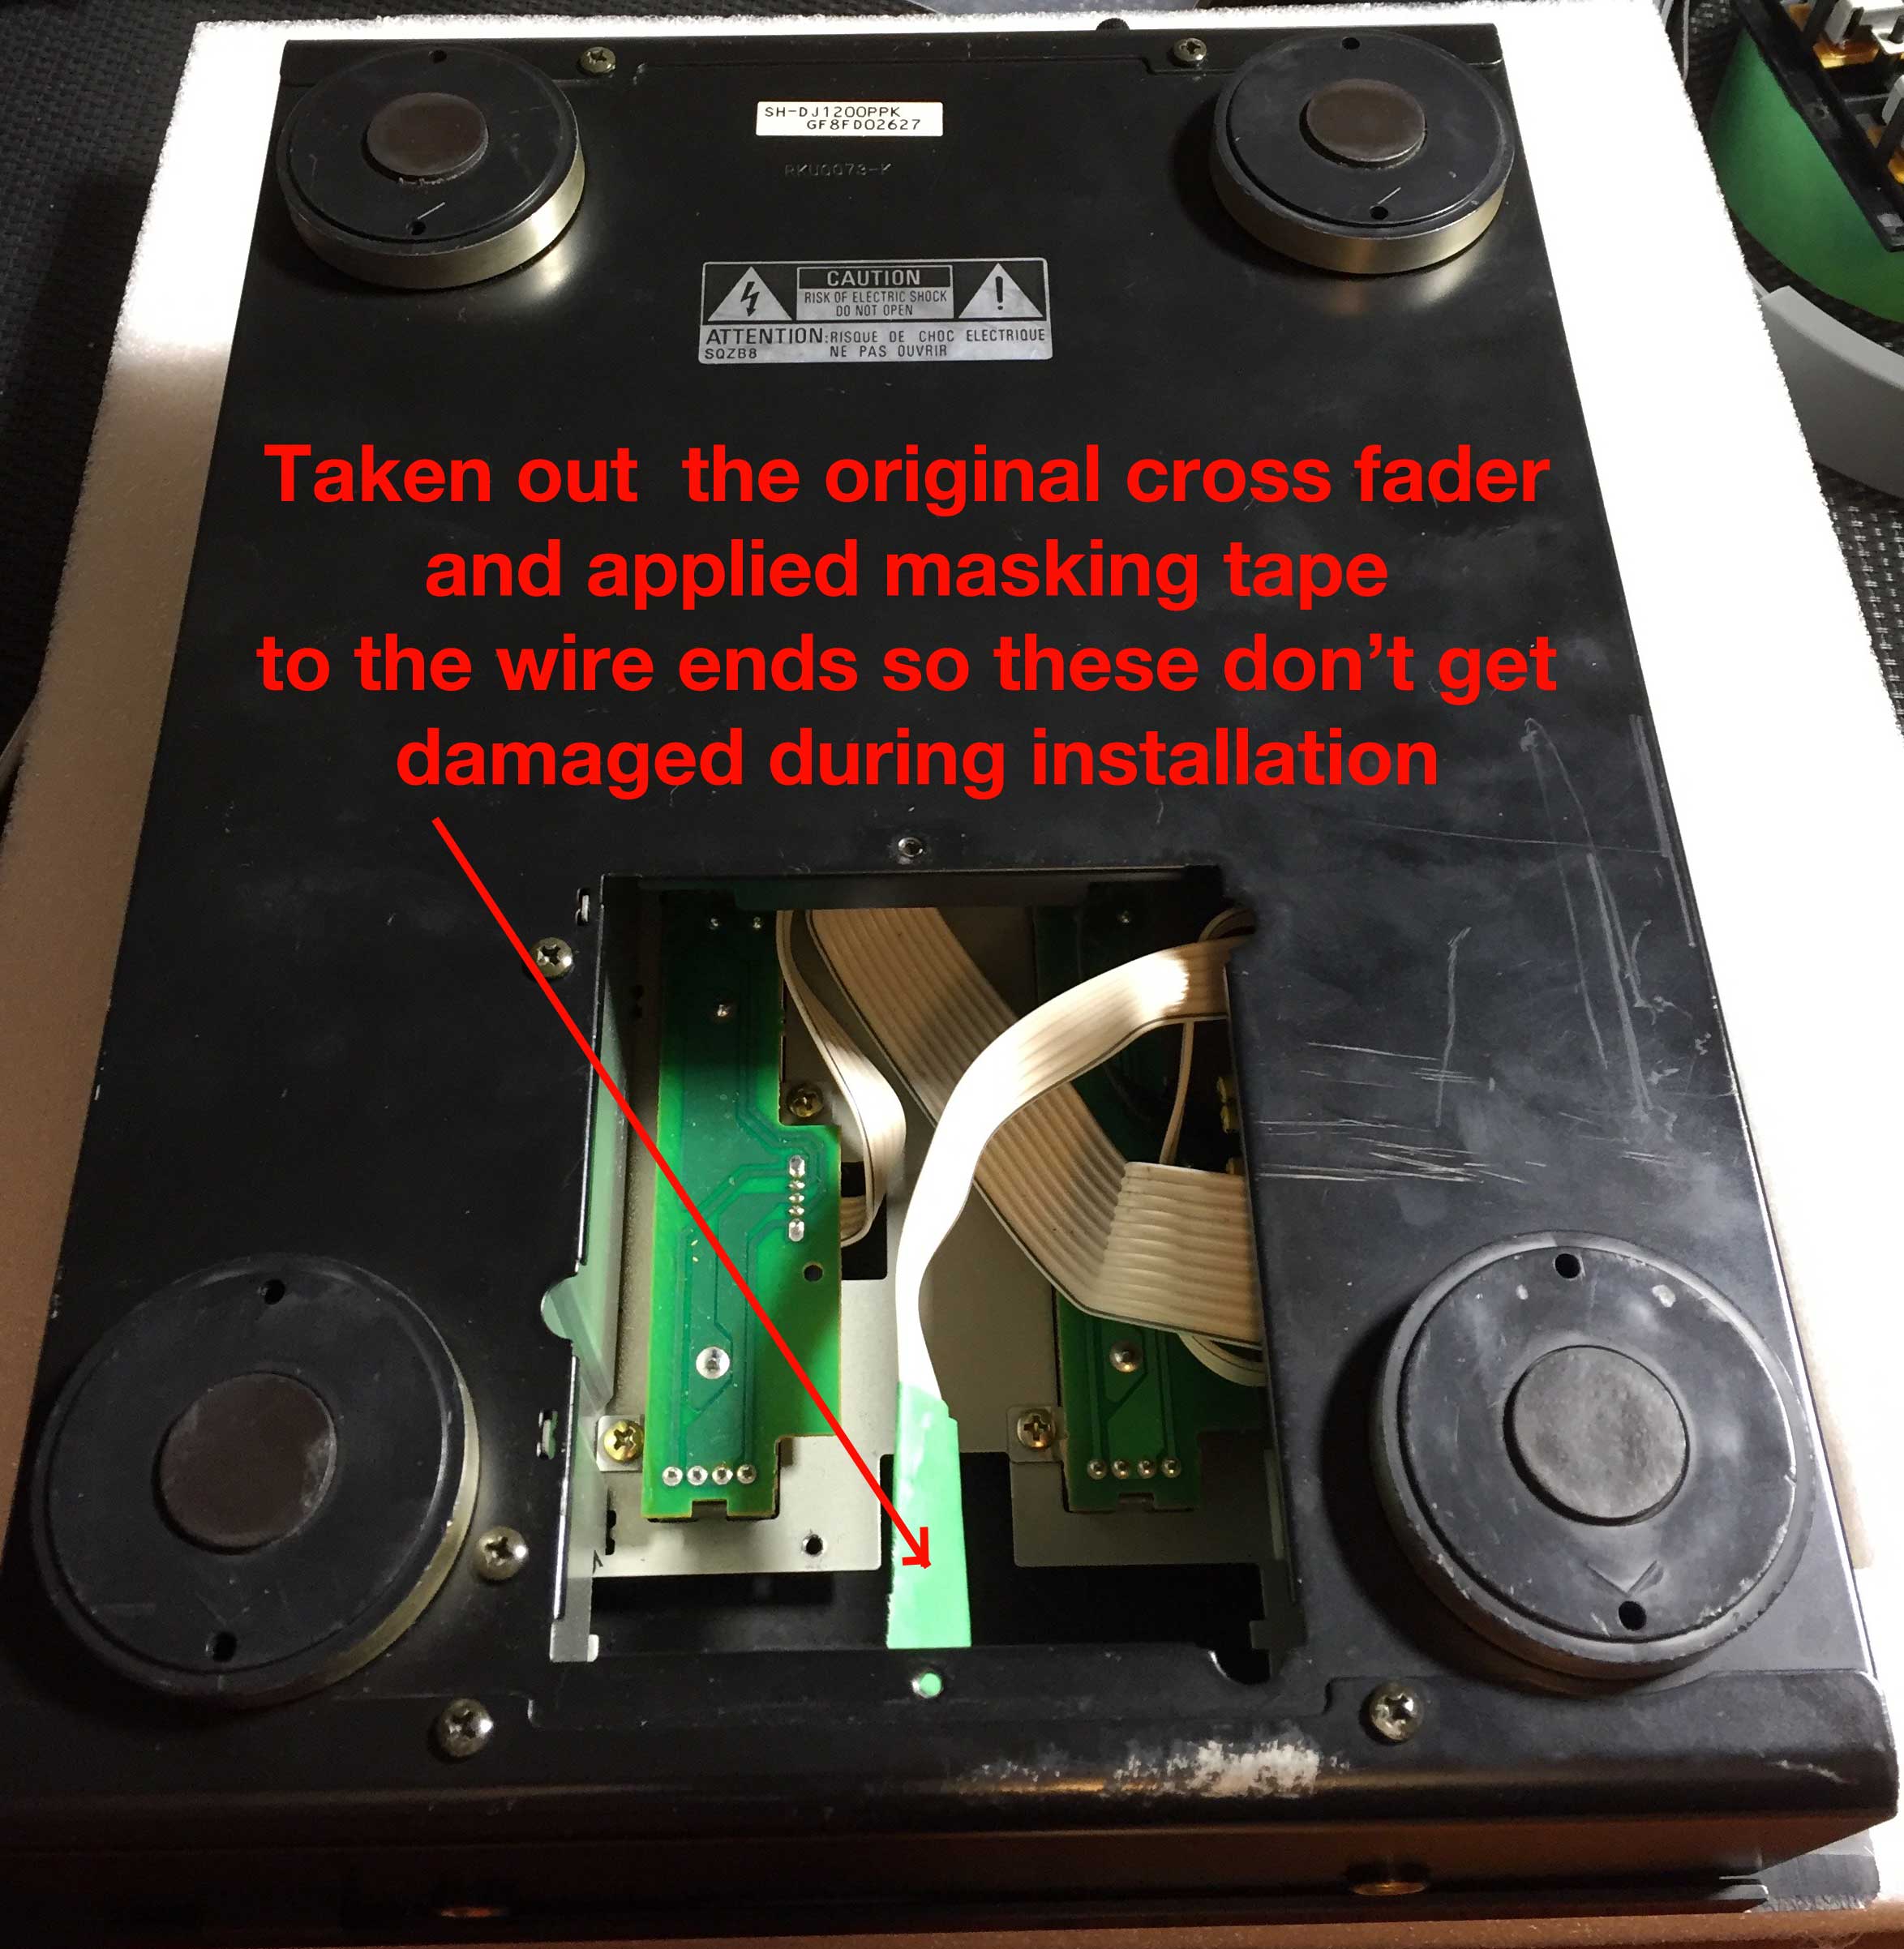
Do the wiring as shown here. You will need a soldering iron because this mixer doesn't have any power cables available in the crossfader section. At the same time, it's easiest to just connect the crossfader cables by soldering them to the non-VCA adapter board. Don't worry about the 2 unconnected wires because they are not used for the SH-DJ1200.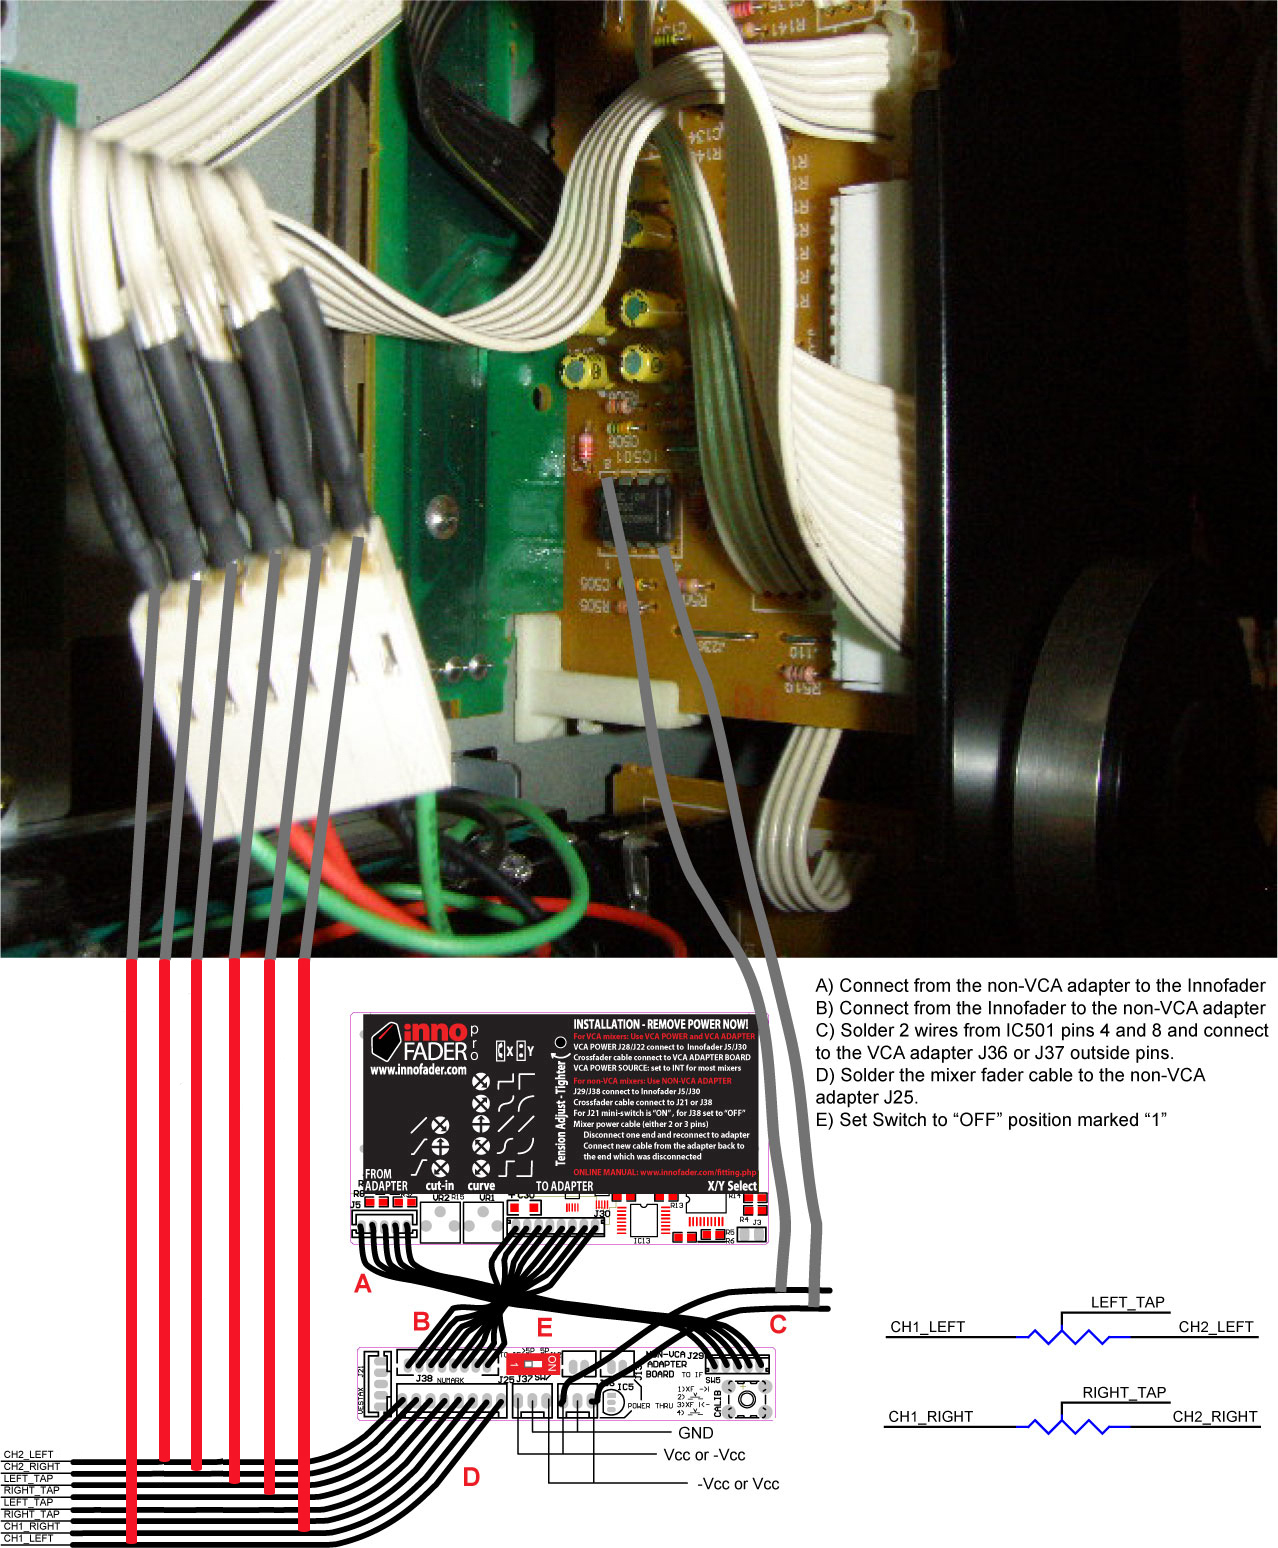
As far as the mechanical mounting, first drill two holes in the crossfader plate. Use a 5mm drill bit and spacing the holes 65mm apart with the holes symmetrical about the center. When you use the drill bit, only push the bit down until you get a 3mm diameter hole on the bottom. This way the Innofader Pro can easily mount using the included screws. Now when mounting the Innofader place the bracket above the mixer body rather than below so the Innofader stem has enough height.
NOTE: We have customer feedback that the Innofader in the below picture will operate in reverse. Please install the Innofader with the label facing the rear of the unit instead of the front of the unit to make the Innofader operate normally.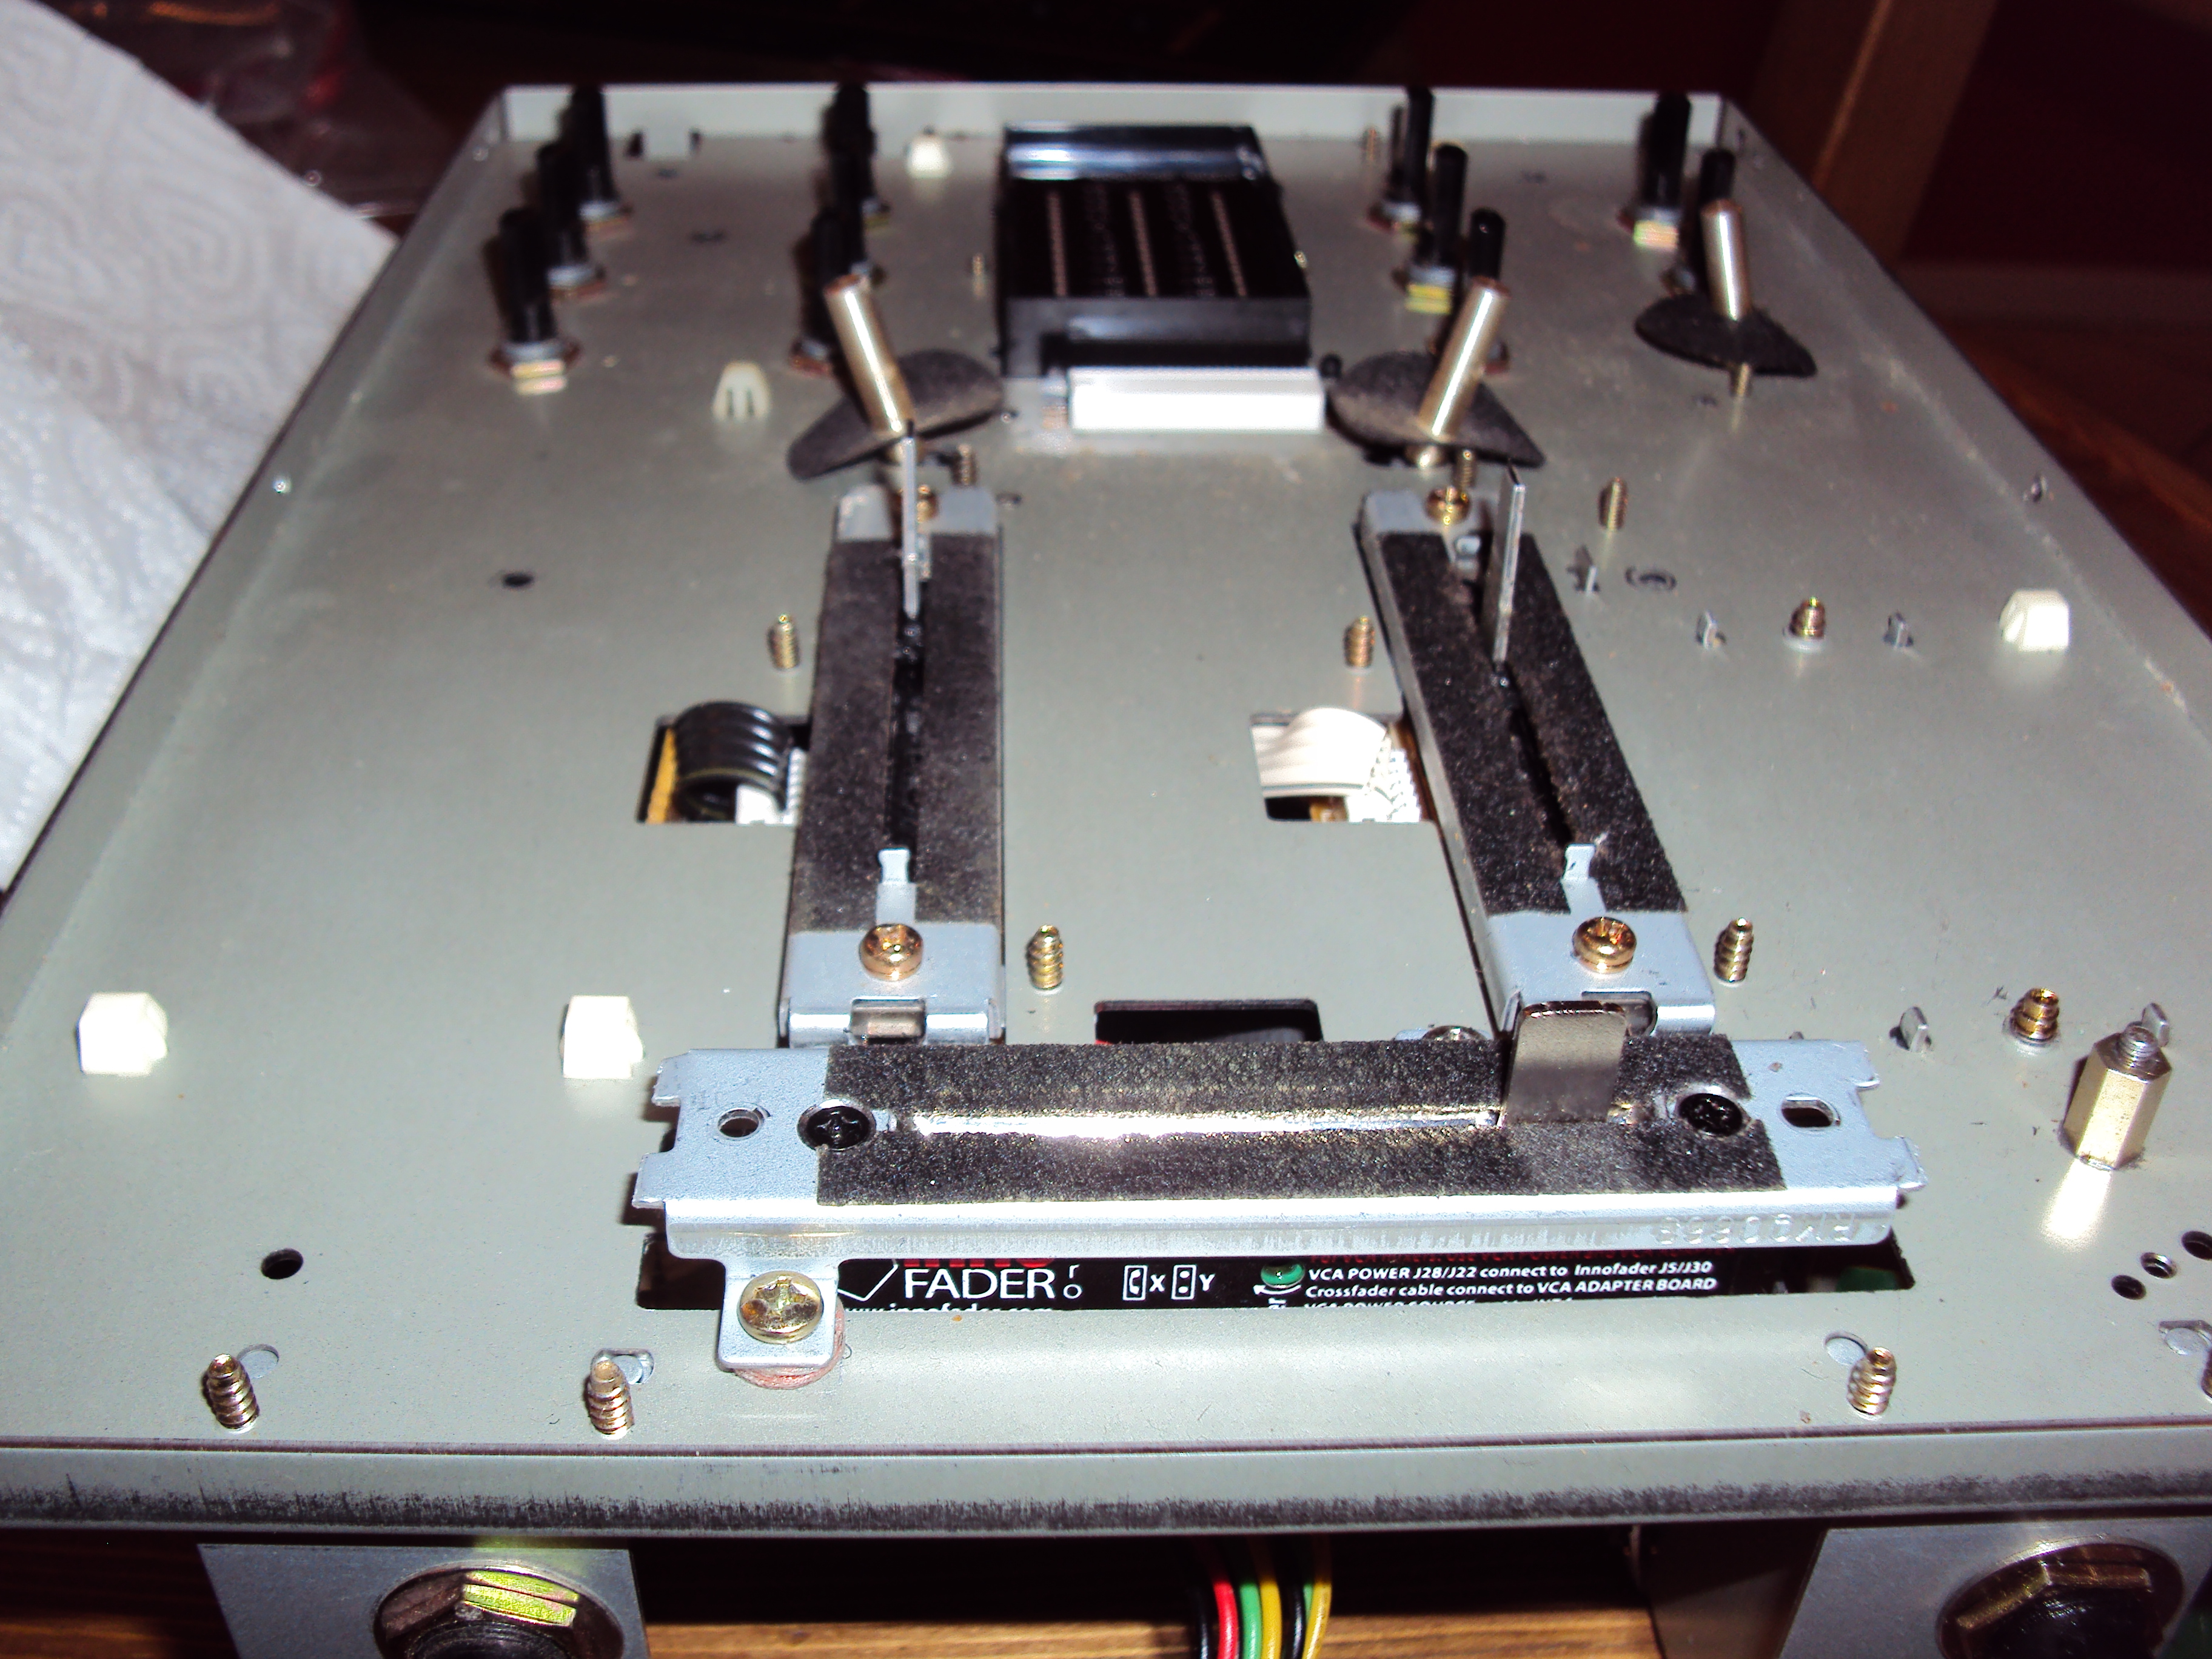
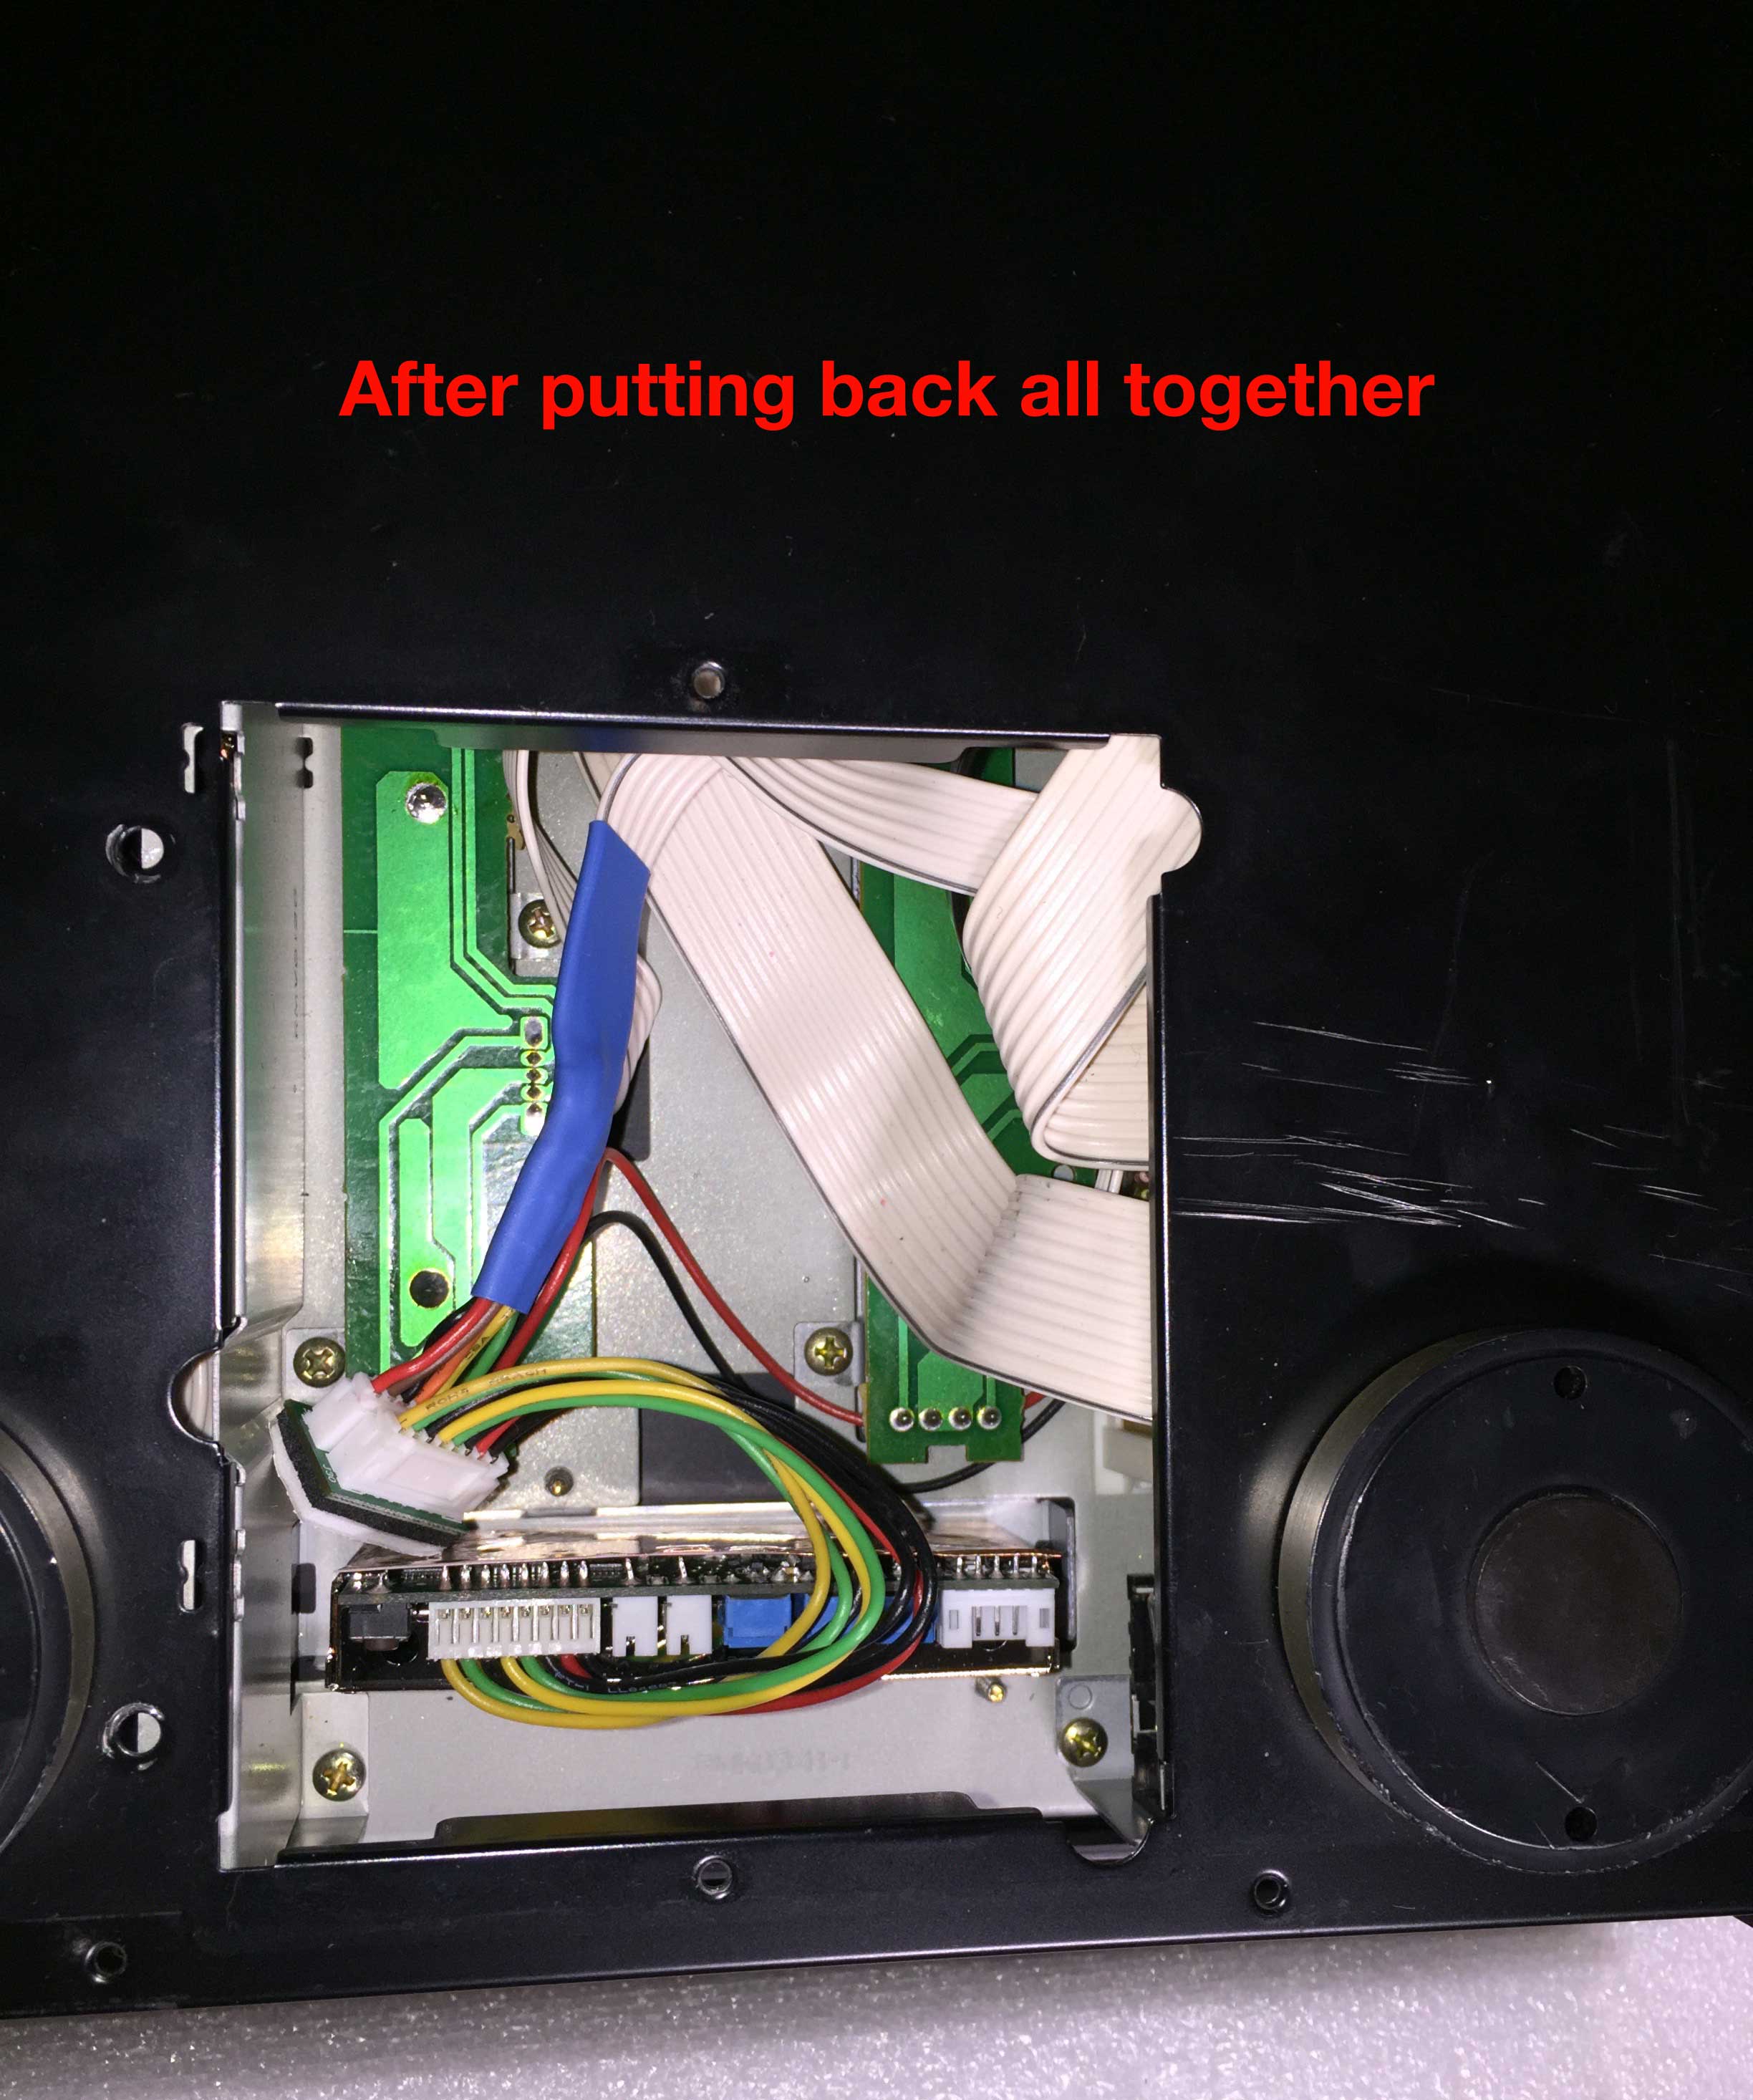
When you're all done it looks like this: